We recently enjoyed a week’s holiday at Pevensey Bay. The home that we rented, like our own, includes many smart features but there are some similarities and differences in approach. One area of difference in smart lighting.
The Studio, Pevensey Bay
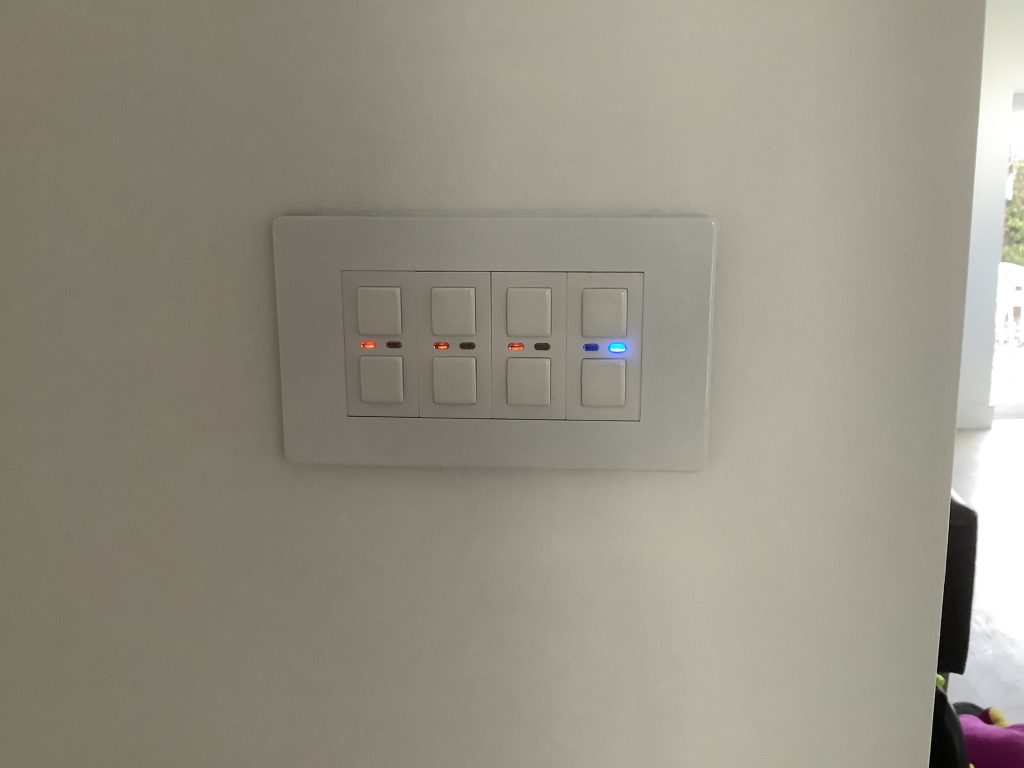
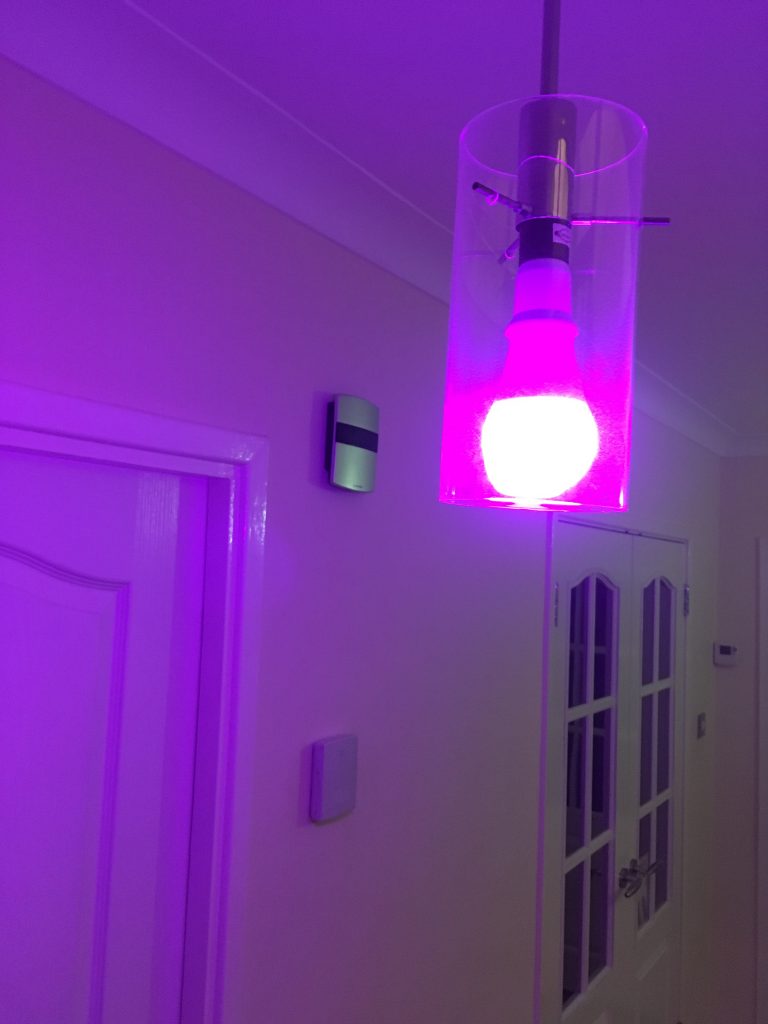
Both our own home and The Studio have smart lighting but differ in approach. Our own smart lighting concentrates on smart bulbs, while The Studio (with the exception of the kitchen) concentrates on smart switches. So why choose one approach over the other?
At our home we have a handful of smart bulbs, with standard dumb switches. The bulbs incorporate functions like dusk-to-dawn lighting and colour change for status indication (open windows, movement in garage etc). At The Studio there are a large number of smart switches controlling an even larger number of standard dumb bulbs.
So let’s think about choices:
Cost.
If you are going to control multiple bulbs together on one circuit then it’s generally cheaper to have one smart switch than multiple smart bulbs.
4 gang Lightwave switch
Coloured smart bulb
Colour.
Smart switches can either control on/off or act as dimmers, but they don’t vary colour. Some smart bulbs can vary colour. If you want to control colour then you’re going to need some sort of remote control (like The Studio in the kitchen) or access via smart device like a phone or tablet.
Wiring.
Most smart light switches require a neutral wire. However many UK homes do NOT provide a neutral wire at the switch. A typical UK light switch has a live, switched live and earth only (I.e. no neutral) although there may be confusion as the switched live is commonly blue (or black in older homes) like a neutral would be.
Adding a neutral can be relatively costly as it requires a new cable between the ceiling rose and the switch. If having a re-wire it’s worth adding neutrals to the specification just in case.
Typical ceiling rose wiring UK.
Example automation
Automation.
Both switches or bulbs can be automated via a smart hub for on/off or brightness to respond to time-of-day, movement, door or window opening etc; so that’s not really grounds to chose between smart switches or smart bulbs.
What about combining smart switches and bulbs on the same circuit?
In short I don’t really know why you’d want to. Even if it worked properly you’d have incurred extra cost for the second smart device for limited benefit as you’ve duplicated the smart functions, but it’s likely not to work properly. Even with simple on/off functions the smart bulb will be missed by the hub when the power is off at the switch (although some ecosystems allow this error to be masked), but with dimmers it will probably be worse as the bulb may not function correctly when the dimmer is set to less than 100% brightness.
You might consider using the smart switch as an smart button without using the switched output, and feed the smart bulb from a permanent live, but that’s not combining them on the same circuit. This could be achieved physically by something as simple as moving the switched live output to the live input on a switch. However the two smart devices, switch and bulb, would then need to be linked entirely programmatically through the hub. That would be at least two automations in HomeKIt – an ‘on’ automation and an ‘off’ automation.
Conclusion
There isn’t a right answer whether smart switches or smart bulbs are best. The best choice will depend on your situation.
One of the features of our home is the all-electric kitchen. We do have gas for space heating and as a back-up on the hot water for days that are both dull and have relatively high cost electricity, but the kitchen is all-electric. I have to say that this was not our choice, rather the kitchen came that way when we bought the house five years ago. We have replaced the oven in the meantime, but until today the hob was that bought with the house.
Unfortunately the hob suffered a failure of the two of the rings and today we’ve replaced it like-for-like with a new inductive unit. Inductive is attractive as it’s relatively efficient, but I was struck by the fact that the one hob required a 32 Amp supply, but the new one manages with a 13 Amp plug.
Bosch PUE611BF1B inductive hob.
So, by what magic does the new hob use less than half the power of its predecessor?
item
old hob
New hob
Smallest ring
1,200 Watts
1,400 Watts
Second smallest
1,400 Watts
1,800 Watts
Second largest
1,800 Watts
1,800 Watts
Largest ring
2,200 Watts
2,200 Watts
Total *
6,600 Watts
3,000 Watts
Tabulated of maximum non-Boost power per ring with manufacturer’s total
The first thing to observe is that the sum of the ring powers does not equal the manufacturer’s total for the new hob, although it does for the old hob. The second would be that the sum of the new ring powers at 7,200 Watts is more than the sum of the old ring powers even though the required total is less!
The answer is that the new hob features power management capability. In any hob the rings will spend much of their time cycling on and off to maintain the required heat. In the old hob all the rings might on at one time drawing maximum power, but a few moments later they might all be off. However the power management in the new hob the total power would be levelled out so that the average over time might be the same, but the peaks smaller and the troughs shallower.
For most people this levelling out of the power demand would pass unnoticed, but for us it could be quite useful.
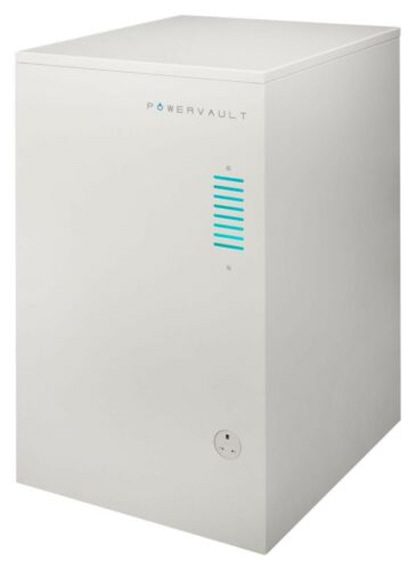
Powervault storage
Grid import
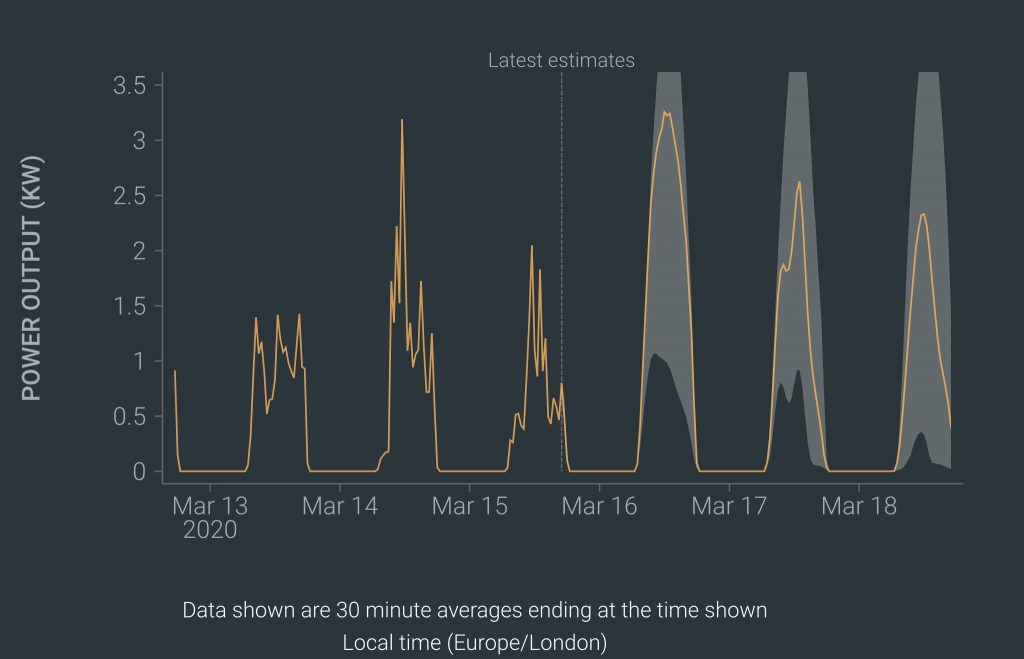
We do most of our cooking in the evenings for which, particularly in winter, power is taken from our Powervault storage battery with any excess from the grid as illustrated by the series of evening spikes in the image to the right. The Powervault has a relatively limited maximum power (hence the spikes) but as the new hob has power management then any spiking beyond battery maximum power capability should be reduced thus avoiding what, for us, could be peak rate electricity at 35 p/kWh on our dynamic smart tariff which is a direct cost save.
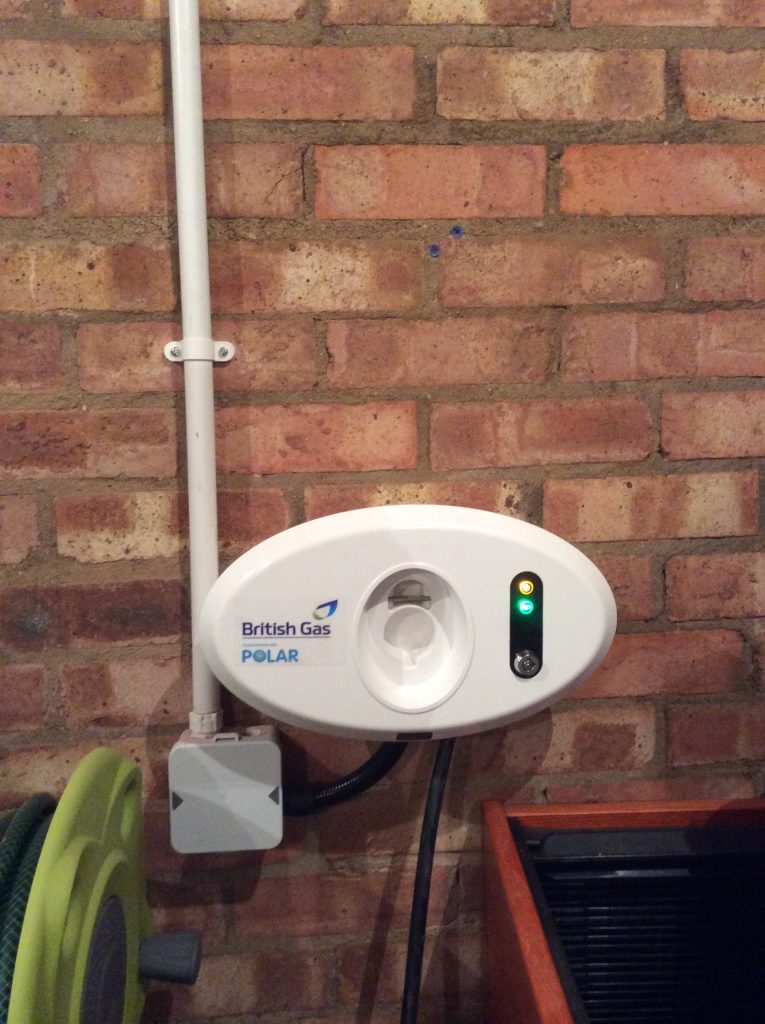
Well, it had to happen. After thirteen-and-a-half years of ownership of a plug-in vehicle we’re about to have two. I have had two briefly before during a vehicle changeover having bought a new one and then sold the old one privately, but now we’re replacing the hybrid that my wife generally drives with a plug-in hybrid. Not only will that give us two plug-in vehicles, but in the six years that I’ve owned the Ampera the standard inlet connector has changed from 5 pins to 7 pins so I can’t charge the new car on my existing smart charger either.
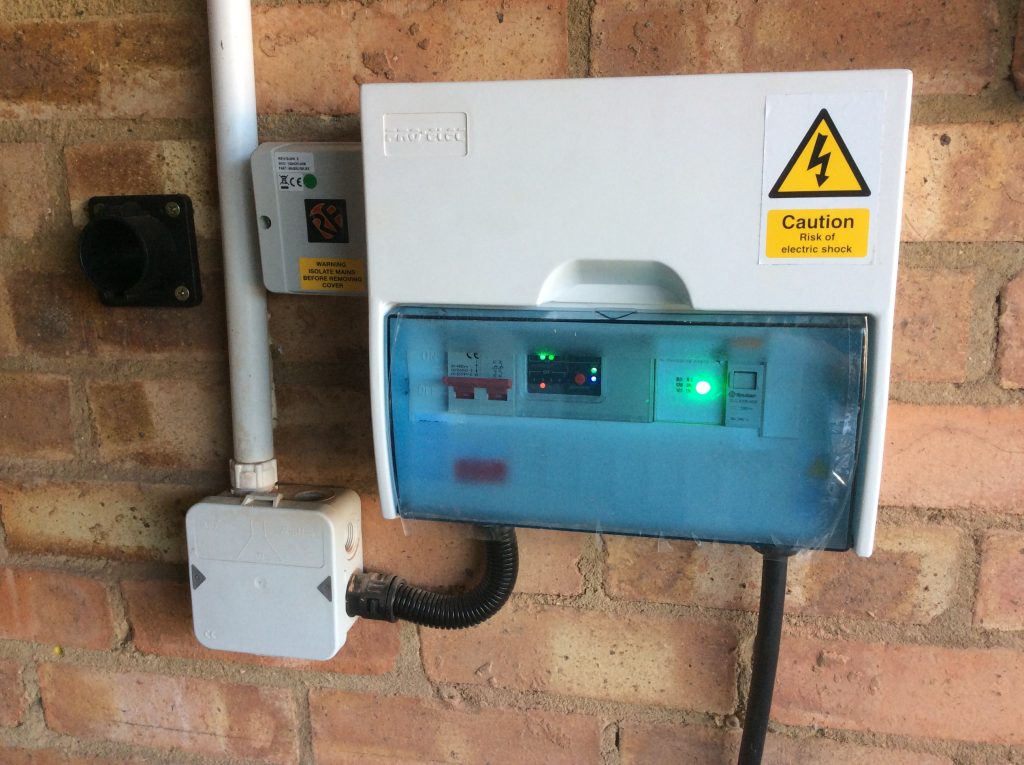
Stepped Mode 3 EVSE in consumer unit case
Most people of course will be content with an off-the-shelf charger, but I had some fairly uniquely requirements. One of the requirements that influenced my original charger was solar self-consumption (the charger automatically turns on when the home is in sufficient solar surplus) but this is now available commercially. My existing charger also adjusts its charge times around the Agile electricity tariff but this too is now available commercially with Ohme. However I still want to be able to coordinate it all centrally via my HEMS so that I can prioritise loads when constrained, or enable interactions like stopping the fixed battery discharging into the car at night and that’s not available commercially.
My solution is similar, but different, to my old charger. Both are modified from existing production chargers as a relatively affordable source of parts, but the new one will retain the production case (because it needs to be waterproof for outdoor use) and be better protected electrically than the old one. It needs to be better protected as electrical standards have moved on and, being outdoors, it needs to be more sophisticated to make up for the UK’s somewhat unusual earthing system (at least by international standards). It will also be smarter, but that will be described in later posts.
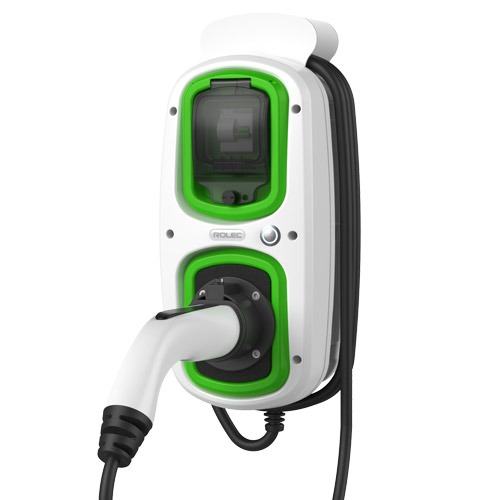
Commercial Mode 3 EVSE
Commercial Mode 3 EVSE – 2nd donor
Donors for first and second Smart EVSE.
The most common earthing system in the UK involves a cable between the home and the substation called a Protective Earth Neutral (PEN) conductor which, as its name implies, provides both the neutral and earth on a single core. Remember PEN as it will come up later..
My new charger will also be higher power than the old one. The old one is designed for 10 Amps continuous grid load (16 Amps peak from solar) based on the limitations of my garage supply, but the new one is designed for 32 Amps continuous load in anticipation of a future fully-electric vehicle. I have owned a fully electric vehicle previously, but for the moment both our vehicles will be plug-in hybrids. Some would argue the case for one being an Extended-Range Electric Vehicle (E-REV) or Range-EXtended Battery Electric Vehicle (REX BEV).
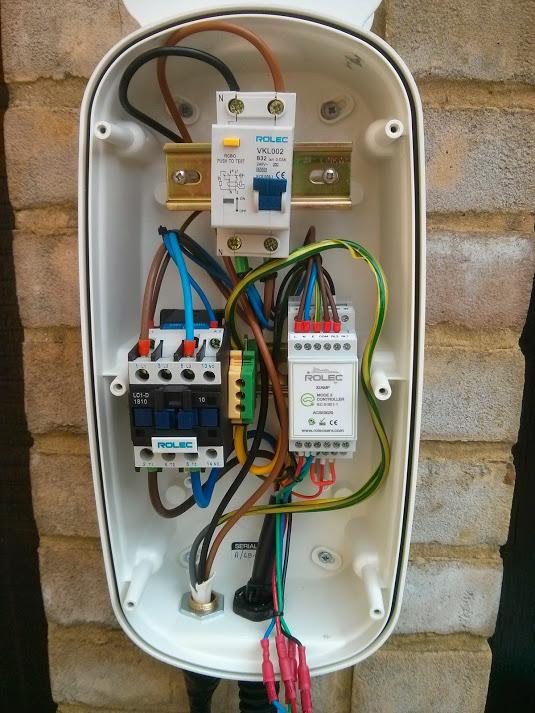
Similar production charger
My updated charger (work in progress)
Inside donor and modified EVSE.
The two internal pictures above show a similar production charger alongside my updated charger. The differences are (from top to bottom):
RCBO (combines over-current and residual current detection) – is actually carried over donor, but my charger came with a later model than the similar charger illustrated.
Earth terminal – I relocated from centre middle row to right top row to make space.
Residual Current Monitor (RCM) – The RCM (a small black box which encircles the live and neutral) sits behind the RCBO and triggers shutdown in the event of a D.C. fault.
PEN Loss Current Transformer – between the top and middle rails a small black ring sits around the earth cable. This is similar in principle to the RCM but rather than detect a D.C. fault on the supply, its role is to detect a fault current to earth. That’s not enough alone to provide PEN-loss detection alone but provides additional detection to that in the Protocol Controller (which we’ll get to soon).
Power contactor. The second rail starts on the left with a power contactor which disconnects the live and the neutral from the car when not charging. Mine is similar to the Rolec original, but smaller,
Switched Protective Earth (SPE) contactor. In the centre of the unit sits a second similar contactor, only this one switches the earth. Switching an earth is unusual but is required to protect against a failure of the PEN conductor between home and substation. The power contactor will not close and the car will not charge if the SPE is open with the result that the car is completely isolated from the mains supply during this failure mode.
Protocol controller. To the right of the centre rail is the protocol controller. This replaces the the original protocol controller which was in a similar position. The fundamental need to change was driven by the requirement to vary the charge current dynamically, but the new protocol controller also monitors not only the two current transformers (RCM and PEN-loss) but also the supply voltage in order to decide when to open the SPE contactor.
Raspberry Pi. At the bottom is an empty Raspberry Pi case to illustrate the sufficient space is available. The actual Raspberry Pi will be smaller. The role of the Pi is to tell the protocol controller how much current should be drawn. The Pi will tell the protocol controller via an analogue voltage, and the protocol controller will tell the car via a Pulse Width Modulated (PWM) signal – that is the width of a stream of voltage pulse indicates the current that the car should draw. The replaces the Programmable Logic Controller (PLC) and RF Solutions radio link in my older smart charger.
LED leads. At the very bottom 4 leads with red connectors leave the picture on the left which go to an external multicolour LED for charger status. I haven’t yet decided how to reproduce this. The donor LED is unsuitable as it only has three colours (Red, Green and Blue) but the protocol controller assumes that two further colours (white and purple) are also available,
Item
My original smart charger
New donor
My New smart charger
Switch
Double pole
+ RCBO
c/o from donor
RCM CT
No
No
New
PEN-loss CT
No
No
New
Power contactor
Yes
Yes
Yes
SPE contactor
No
No
Yes
Protocol controller
Viridian v1.0 (variable current)
Rolec (fixed current)
Viridian v2.0 (variable current with extra safety content)
Smart controller
Programmable Logic Controller (PLC)
No
Raspberry Pi
External communications
Radio (RF Solutions)
No
Wi-Fi (Part of Pi)
Status LED
LED on protocol controller visible through clear cover.
External LED. No LED on protocol controller.
External TBD. LED on protocol controller (not visible).
Comparison. between my existing smart charger, new donor, and new smart charger.
The new hardware will thus shutdown in the event of the following faults:
Over-current
Residual current (live – neutral)
DC current *
Earth leakage current *
Over-voltage *
Under-voltage *
Inferred PEN loss *
Lack of earth continuity between vehicle and wallbox
* These are additional protections in my new hardware that weren’t present in the old one.
At this point I should have a working dumb charger with 32 Amp capability, albeit that it’s untested as yet through lack of a compatible vehicle with a Type 2 vehicle inlet.
There are two items for which I’m awaiting delivery. Firstly I’ll be using a Raspberry Pi Zero to generate the current demand signal which will replace the empty black case in the picture and secondly I have a small 5V power supply on order to power that Pi.
Future posts will look at adding the smart controls.
Like many households we actively embrace recycling, sorting our routine household waste into (i) garden and kitchen waste (i.e. uneaten food), (ii) glass (jars, bottles etc), (iii) other recyclables (paper, card, tins, some plastics) and (iv) non-recyclables. Other sorts of waste can be returned to the recycling centre including (I) electrical and electronic (WEEE), (ii) batteries, (iii) used oil and (iv) wood. This post concerns batteries.
The 3Rs: Reuse, Reduce and Recycle
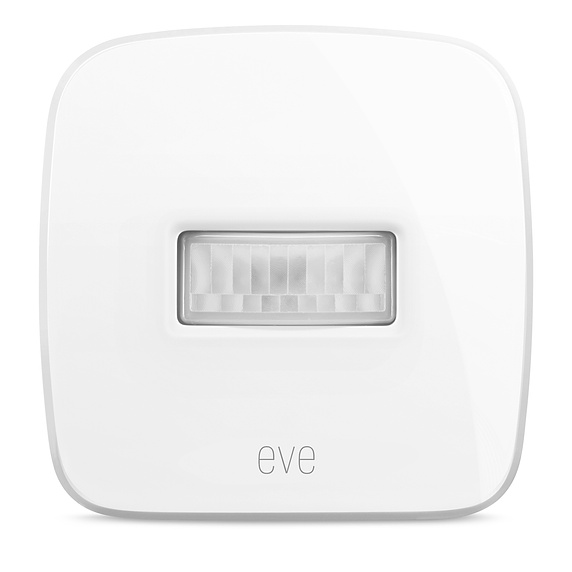
Like many households with small children we have many batteries in use in toys as well as in items like TV remote controls, burglar alarm sensors, and the doorbell. However we also have dozens in smart home devices like radiator valves and sensors including window, movement and environmental. Of the 3Rs of Reuse, Reduce and Recycle we are clearly far from Reduce.
Recycle is clearly possible with many supermarkets adding bins to collect used alkaline batteries which at least prevents that material going to landfill, but does involve energy and other inputs for recycling.
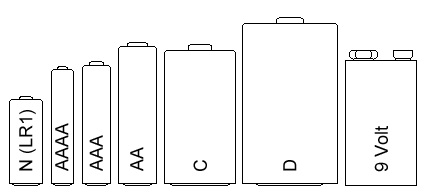
The alternative that I’ve been exploring for some time is Reuse. The closure of the Maplin chain in early 2018 prompted me to acquire some discount Nickel Metal Hydride (NiMH) batteries in both AA and AAA sizes and a suitable charger from my local store’s clearance sale. These batteries are the same size as the mostly commonly used alkaline batteries but have a slightly lower voltage being 1.2 Volts rather than 1.5 Volts.
Different battery sizes compared
I’ve been running these NiMH cells of AA size in Eve smart home devices for two and a half years gradually replacing alkaline batteries as they became exhausted. My only issue has been that the low battery warnings on the Eve devices are almost always set since the batteries have a lower voltage even when full, even though the batteries have plenty of power to run the device. One thus cannot rely on the low battery warning to flag the need to change the batteries, and so I have adopted a pattern of swapping freshly recharged batteries for part-discharged batteries on a quarterly basis. Over the first weekend of the first quarter I work my way around the house room by room swapping and recharging batteries.
After two and a half years I’ve acquired multiple types of rechargeable NiMH batteries from different brands or of different capacities. I make a habit of charging and using only like cells together.
So far I’ve had no failures of rechargeable batteries.
1/2AA lithium batteries
Suitable charger
Rechargeable batteries for door/ window sensors.
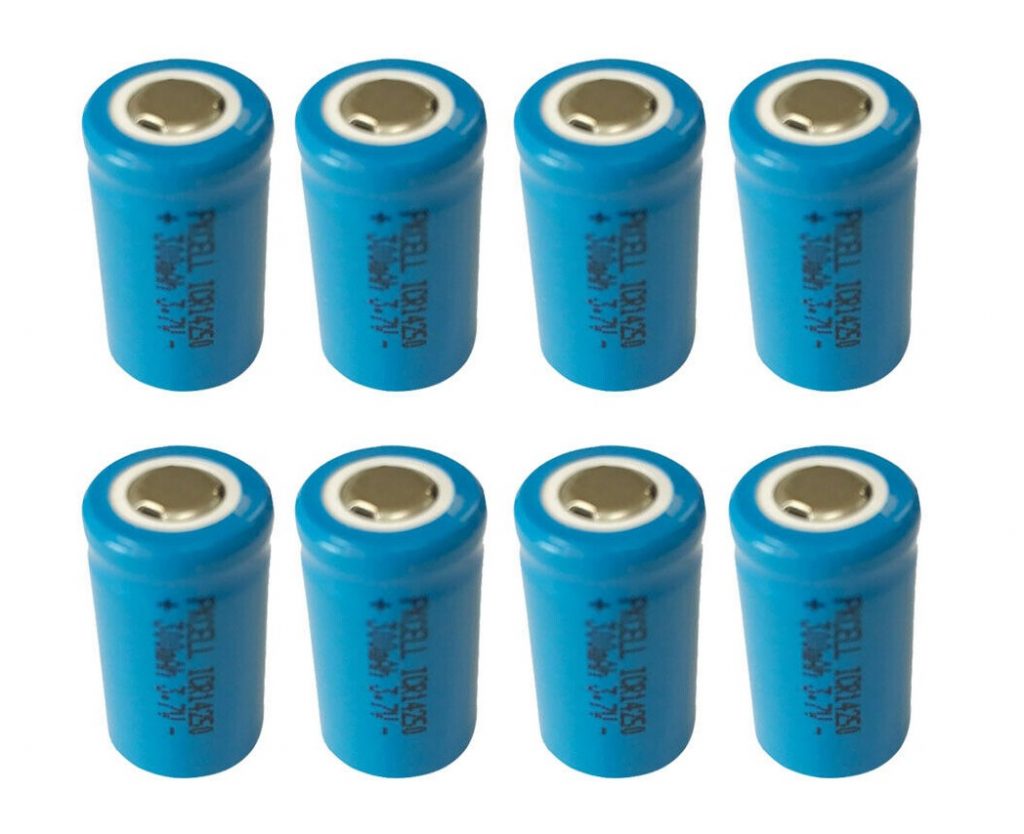
The latest change is that I managed to locate a rechargeable replacement for the 1/2AA non-rechargeable lithium batteries used in the door/window sensors. These 1/2AA batteries are half the length of a regular AA battery, but are 3.7 Volts rather than the 1.5 Volts of an alkaline cell. The voltage of these rechargeable cells is the same as the standard non-rechargeable equivalents so hopefully the near-continuous low voltage warnings can be avoided.
1/2AA batteries with Lithium-based chemistries are commonly described as being of size 14250 – that is a diameter of approximately 14 mm and a height of 250 1/10ths of a millimetre (I.e. 25 mm).
Next time a door or window sensor battery requires changing I’ll be able to put these to the test.
I was recently amused to see a smart home feature in a television advertisement for Admiral Insurance. In that advertisement George the householder meets The Admiral outside the local bistro and, as the day is set to be warm, decides to turn down his smart heating from his smart phone.
George and The Admiral
Unfortunately George manages to hit the wrong button on his smartphone and instead of turning off the heating manages to open the garage door.
An unfortunate chain of events
The opening garage door hits George’s red car, which hits the yellow car, and pushes down the boundary wall onto the road. George witnesses all this as it turns out that the bistro is on the opposite side of the road to his home, so has a go with another button.
Sprinklers on
George’s second attempt at adjusting the heating is no more successful as he manages to turn the fire sprinklers on which floods the house. Hopefully George has more than just multi-car Insurance.
So, besides amusement, what else might we gain from George’s issues?
Firstly, I’ll observe that in my home you can put the whole heating system into summer which disables heating completely (such as in the summer), or vacation which disables the schedules but which continues to heat as necessary to maintain a minimum temperature (such as winter frost protection), or turn off the radiators in individual rooms, or turn down the temperature until such time as the schedule turns them back up.
You don’t always get many characters to label a device or scene, but it does need to be clear what function will be achieved by pushing the button. (I find rules particularly frustrating in the Apple Home app as you can’t name rules and it becomes hard to distinguish between them, although Eve’s app which edits the same rules does allow naming and is much clearer for programming rules generally. The WIFIPLUG app also allows the button to be customised with a photograph of the appliance which is quite neat.)
Devices like garage door openers can be linked to safety interlocks. I don’t have one myself but you can have a light beam, for example, across the doorway so you can’t close the door when obstructed by a car. I haven’t come across an interlock which ensures that the car is far enough from the door to allow opening, although in reality I think that a domestic car door opener would likely stop when it touched the car, detect an over torque / current condition, and then automatically reverse.
Finally I think that smart home systems would benefit from a configurable ‘Are you sure?’ question to double-check that the user really wanted to perform some potentially damaging action such as open or unlock a door.
Click to play the advertisement
(Tapping the Admiral is a nautical expression referring to being prepared to drink anything alcoholic rather than be without a drink, notably including drinking the contents of the barrel in which the body of a recently deceased and pickled admiral was being carried.)
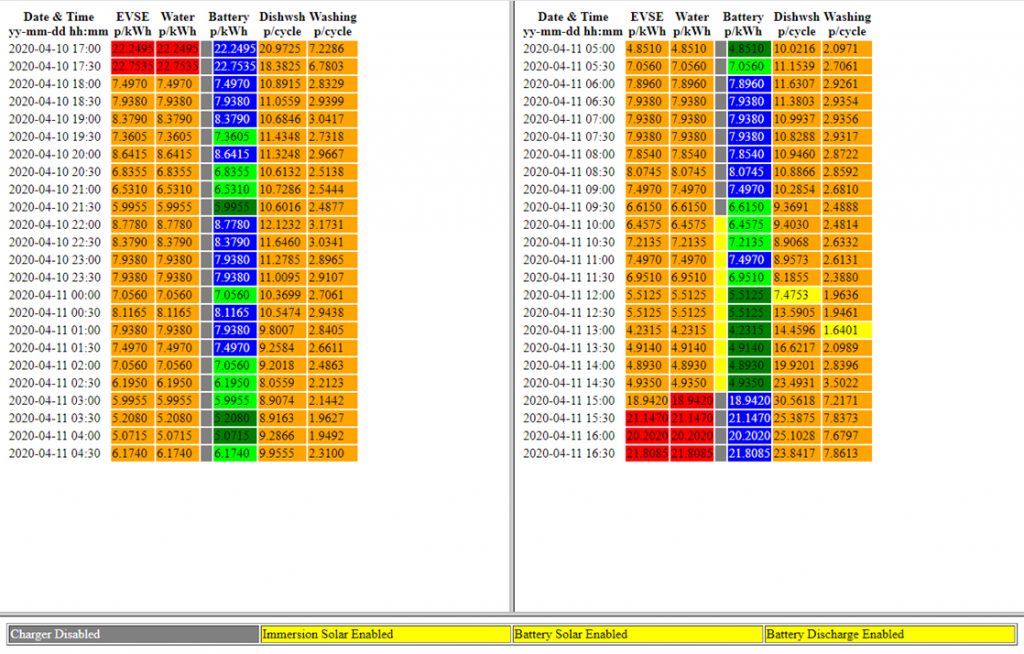
Regular readers will know that my Energy Smart home includes a storage battery. That battery is either charged from my solar panels (effectively free electricity), or low cost electricity bought from the grid, or some combination of the two depending on the solar forecast for the day ahead.
Powervault storage
Solar forecast
The logic of how much battery charging is required has until now been driven by a set value for the number of charging hours required. The number of hours of solar charging predicted is deducted from the the number of charging hours required to calculate the number of bought charging hours required outside the solar production window.
Bought charging hours required :=
Total hours required – Solar hours predicted
However with experience this appears to be a sub-optimal arrangement. At one extreme on a very sunny day the battery will fully charge and then be allowed to discharge continuously through all other hours, there is no middle ground in which the battery is not permitted to discharge through the night. However at the other extreme if the battery is replenished entirely from the grid then there will be hours when discharge is not permitted since, after accounting for cycle efficiency, the value of the electricity in the battery is higher than the cost of that from the grid and thus it’s better value to use grid electricity than stored electricity. As there are fewer discharging hours then fewer hours of charging will be required to refill. Thus the depth of discharge is greater when charged from solar than from the grid requiring more charging hours to refill. Leaving the longer charge time for a full charge in use then creates a risk of charging the battery when the grid price is higher than necessary leaving the battery possibly full by the time the lowest cost grid energy is available. Having a more accurate target for the charge time would enable the lowest cost charging periods to be selected more precisely.
Schedule with some solar
The new refinement is to automatically adjust the bought charging hours between two existing user-defined values: the existing target hours and the maximum charging hours currently used just to cap charging hours during plunge pricing events (i.e those with negative cost events). The new algorithm can adjust to any value between the two limits in half hour intervals. As currently configured that’s anything between five and seven hours. The new algorithm is:
Total hours required := minimum (Maximum hours from plunge, maximum (Target hours, Solar hours predicted + 1))
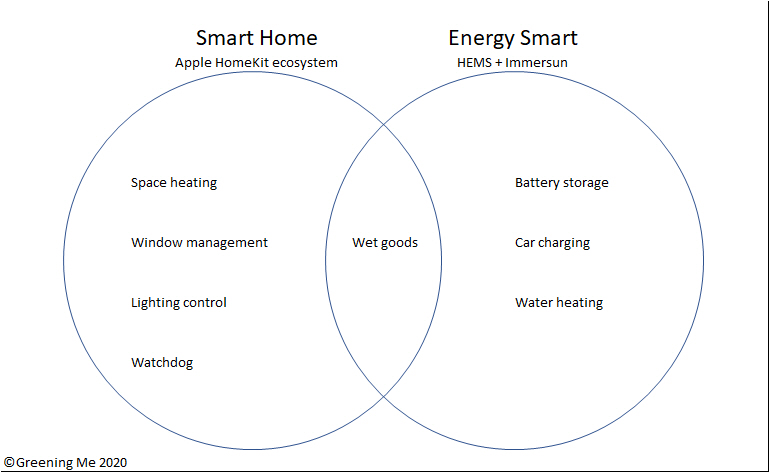
One of the challenges in the smart home world is to distinguish between a group of functions associated with remote control of devices in the home for aesthetic or convenience reasons versus automation associated with the management of electricity costs, carbon management, or smart grid integration. I thus choose to differentiate using the terms Smart Home and Energy Smart.
Space heating. In many homes space heating is controlled by a central thermostat and timer, possibly in combination with Thermostatic Radiator Valves (TRVs). In my home thermostats and timers are commonly pushed down to room level with individual rooms set points and schedules. General advice to reduce heating costs is to reduce heat loss through insulation and lower temperature set points, which I have but also add only heating rooms in which heat is required.
Window management. On occasions household members were known to go out leaving windows open. We now monitor the most commonly left open windows (plus the garage door) and use their status to illuminate and colour a smart bulb in the hall near the burglar alarm panel. The same window sensors can also be used to disable heating in rooms while the window is open.
Lighting control. We automate dusk-to-dawn external and internal lighting by the front door and in the downstairs hall. There’s overlap in bulbs between Window Management and Lighting Control.
Watchdog. To improve the robustness of all the rules operating the above functions, I have a smart plug that cycles on and off automatically at regular intervals and is used to trigger re-evaluation of the rules.
Battery Storage. Storing surplus output from my solar panels for later use, or buying energy from the grid when the price is low to avoid buying later when the price is higher.
Car charging. Managing my car charger to absorb surplus solar energy or buy energy from the grid when most cost-effective.
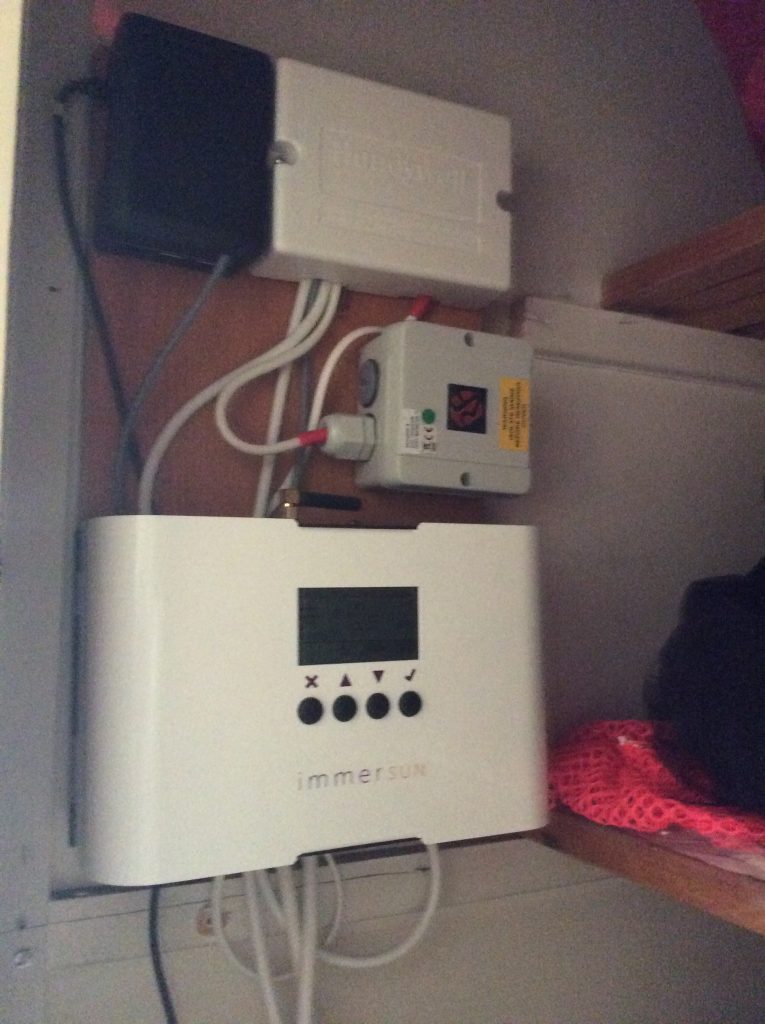
Water heating. Managing my immersion heater similarly. My immersun manages self-consumption of the surplus from my solar panels by diverting a proportional amount of power to the immersion heater, while the HEMS can boost the immersun at full power when the bought electricity price is suitably low.
Both Smart Home and Energy Smart
WIFIPLUG smart plug
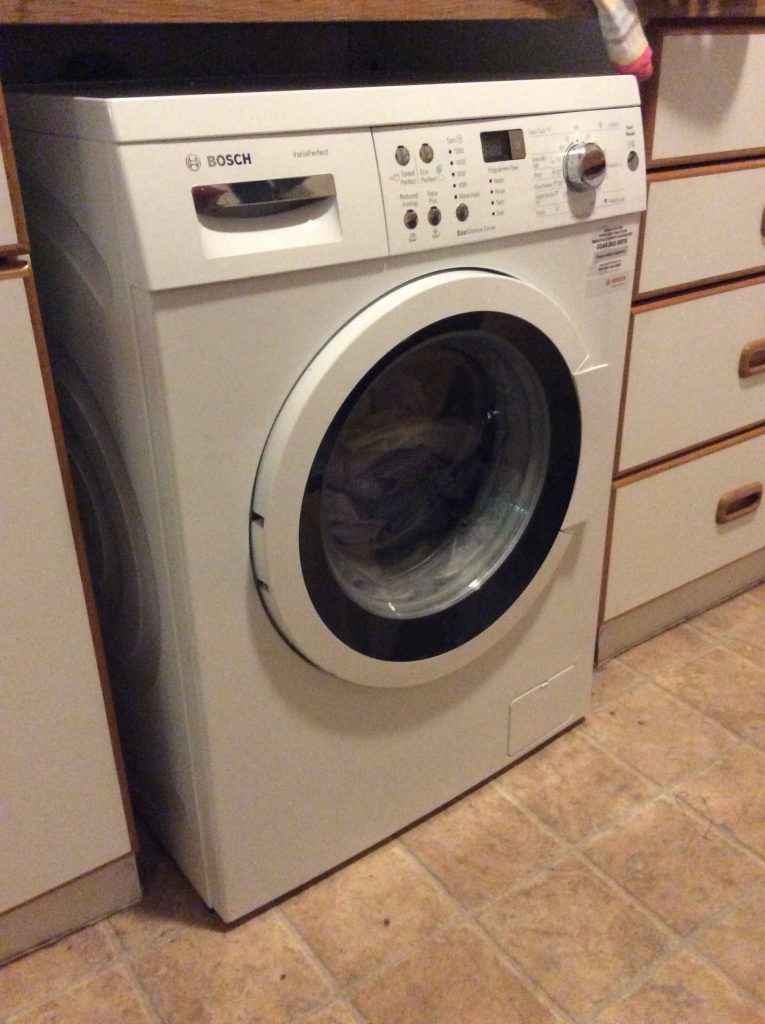
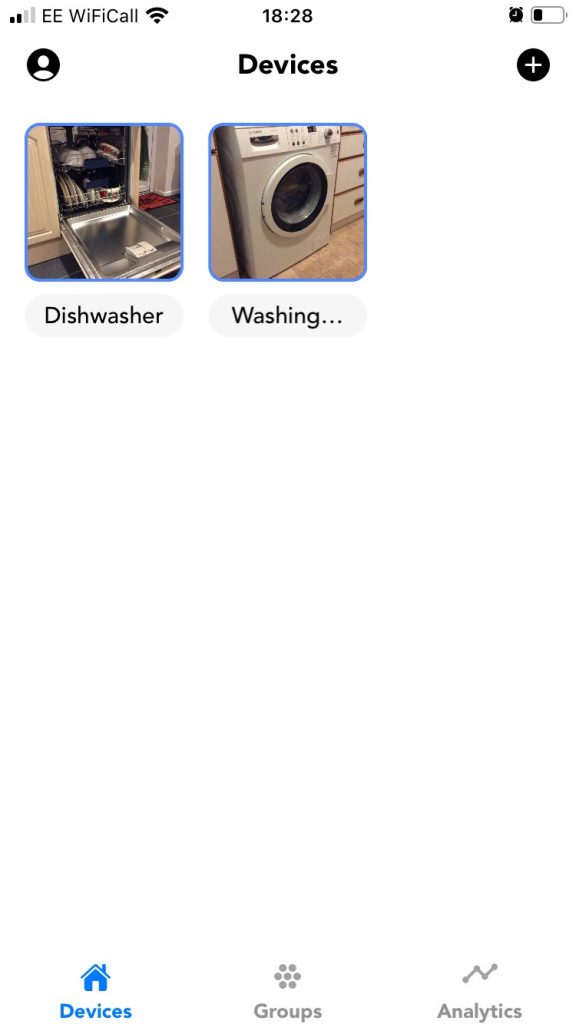
Bosch Washing Machine
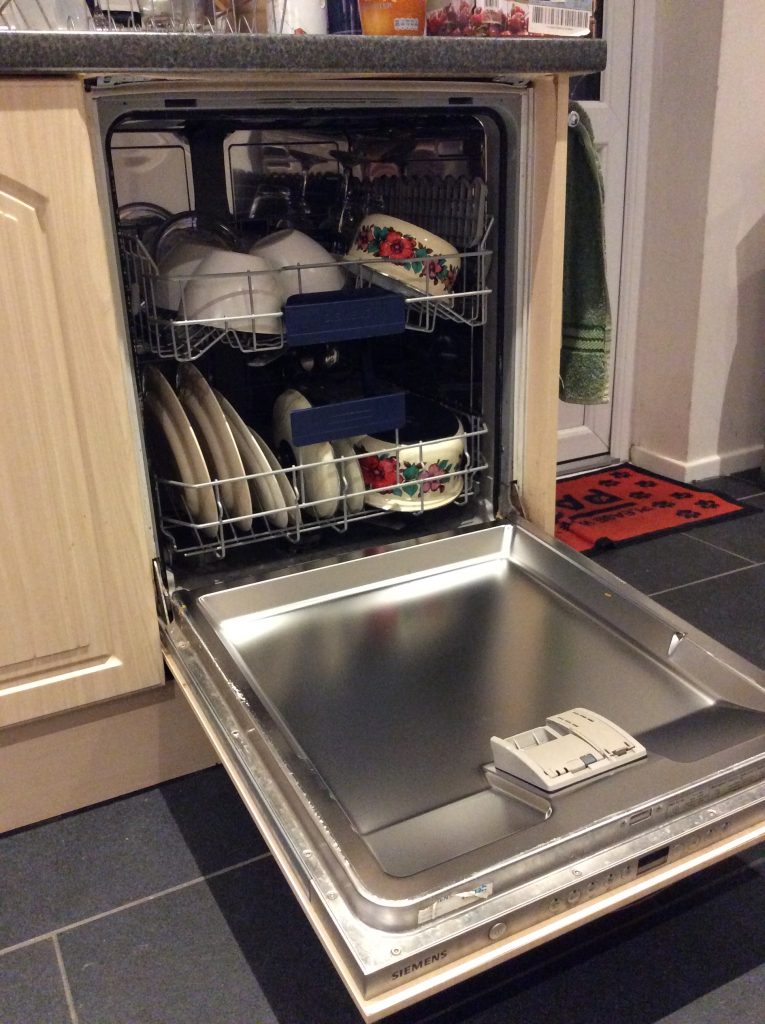
Wet goods. Controlling dishwasher and washing machine for lowest energy cost at the boundary of Smart Home and Energy Smart in both the Apple HomeKit ecosystem and with API integration for HEMS.
The Smart Home group of devices is managed via various user-friendly interfaces within apps like Apple’s Home or the Eve app where rules can be created of the form if {any trigger(s)} and {all conditions} then set {scene(s)}. These are processed by a hub which in my case is an Apple TV (or two).
On the other hand the Energy Smart devices are managed via the HEMS and are controlled by more fundamental programs (strictly in my case scripts) which are executed on my HEMS (which is based on a Raspberry Pi with HEMS-specific programming of my own creation.
Apple TV as Home hub
Raspberry Pi as HEMS
Contrasting Smart Home and Energy Smart controllers
In summary then, the Apple HomeKit ecosystem provides a smart home environment with a comparatively wide variety of supported devices managed from Apple’s own Home app or companion apps from the device manufacturers; while the Energy Smart side is in its relative infancy and (at least as far as my integration goes) quite a lot of bespoke software.
For me the need for much bespoke software is because I had the majority of the devices first with no thought when acquired of doing a HEMS-like project. They were originally bought or developed to maximise self-consumption of the output of my solar panels, so I had to develop the software to interface to what equipment I had. However for the Apple HomeKit, having settled on Apple HomeKit largely because we were iPad users, it becomes relatively easy to add additional devices that are sold as compatible with the HomeKit ecosystem.
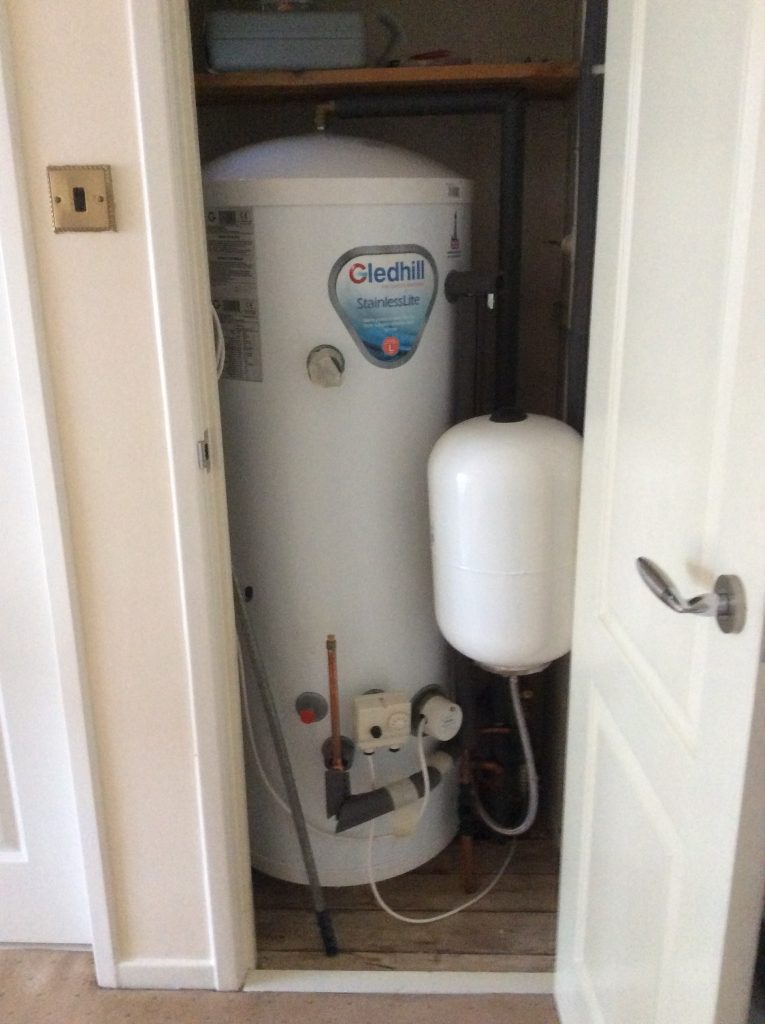
Regular readers may recall that our hot water can be generated in 3 different ways: (i) conventional gas boiler, (ii) from grid electricity and (iii) from the surplus on my own solar panels. Attractions of these options are that gas is always available and stable in price, but my grid electricity is lower carbon and may at times be cheaper than gas, and my solar electricity is lowest in both carbon and cost but is subject to significant daily and seasonal variation.
Hot water cylinder with immersion heater
Smart controls – HEMS and immersun.
The logic to sort out which source to use is managed by my HEMS. Gas is the baseline and the gas boiler is set to heat water for an hour a day in the early evening to ensure that baths etc are possible. The heating is thermostatically controlled so it doesn’t heat if the water is already hot, and that thermostat is set slightly lower than the immersion thermostat too.
The ImmerSUN normally operates automatically to divert surplus solar electricity proportionately to the immersion heater after the needs of general house load, battery charging and car charging have been taken. However if the electricity price is negative (yes, really) then the HEMS may override the ImmerSUN so that water heating is not done by free solar but instead may be delayed to allow use of paid-to-use electricity.
The final part of this triumvirate is buying electricity from the grid to heat water. Here the price of bought electricity is compared either to the price of gas and a decision made to use electricity when it is cheaper (it’s always lower CO2), or compared to the price of surplus solar (effectively zero) to buy from the grid. Both of these are obviously comparisons with a price threshold but until now the choice of threshold has been made manually – typically against gas in winter when solar output is limited and against solar in summer when more readily available. However the reality of UK weather is that this is a compromise as it may be very sunny one day but very dull the next.
Solar forecasting
The new refinement therefore is to use the existing solar forecasting integration. Solar forecasting already informs HEMS decisions about when to charge the storage battery from the grid and when to operate the wet goods (dishwasher and washing machine). The latest change is that the solar forecasting is now also use to choose whether to base a decision to buy electricity for water heating against a threshold related to the gas price or against the price of surplus solar PV.
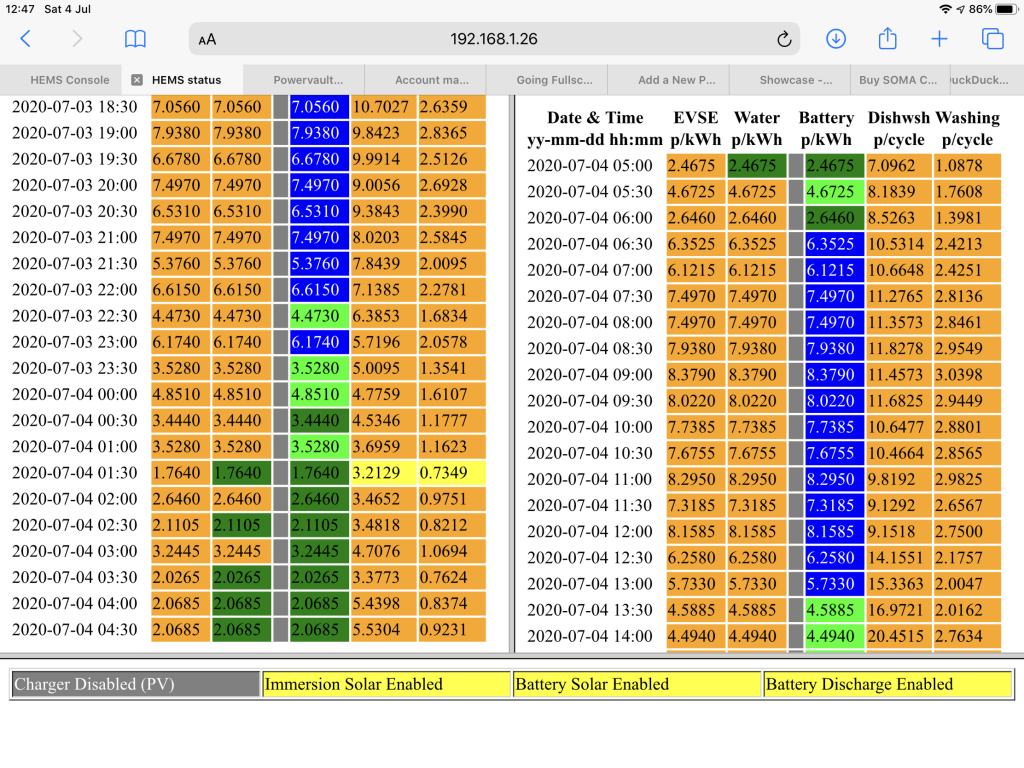
HEMS schedule for July 4th.
The above schedule shows that, as a result of no significant solar production anticipated on the 4th, the HEMS has compared electricity price to gas price and thus elected to buy electricity from the grid to make hot water overnight since at 1.7640 to 2.4675 p/kWh electricity is cheaper than gas.
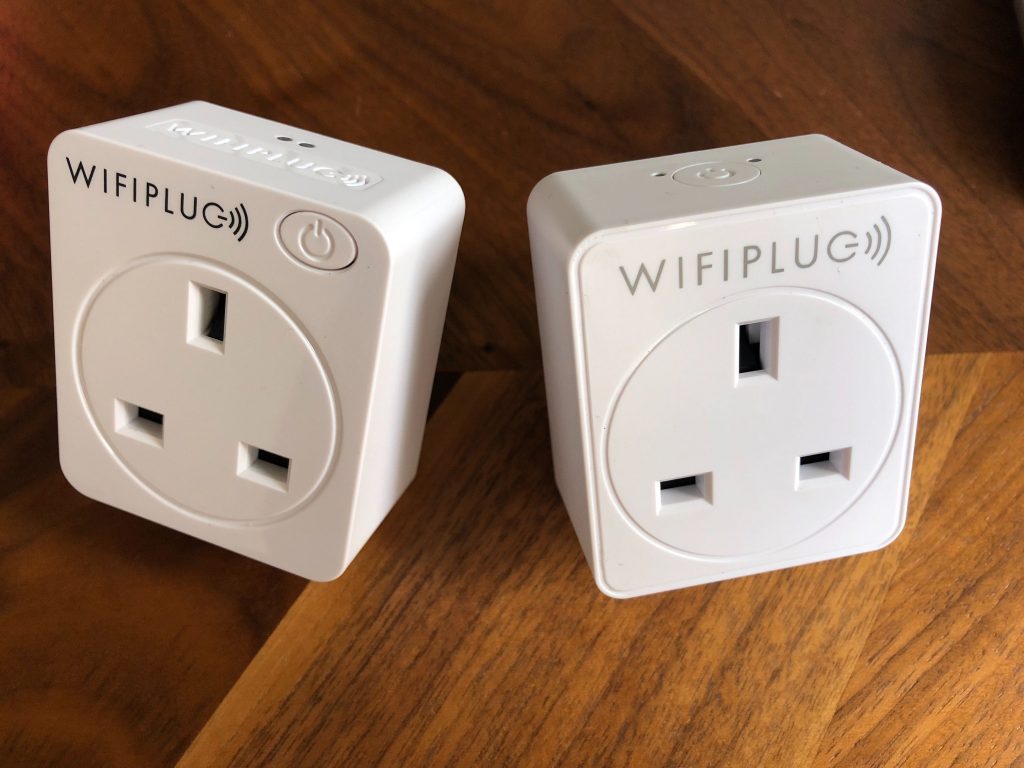
Increasingly I’m starting to use Siri when loading the dishwasher, as in (i) load dishwasher, (ii) start dishwasher, (iii) “Hey Siri, turn the dishwasher off”, and (iv) allow the HEMS to resume the cycle when then cycle cost is most attractive. The dishwasher (and washing machine) are operated by WIFIPLUG smart plugs to achieve this.
WIFIPLUGs v1 and v2.
However on occasions I used WIFIPLUG’s own app to control the plugs rather than Apple’s Home app, the Eve app, or Siri.
The WIFIPLUG app used for dishwasher and washing machine control
However I have a frustration with the WIFIPLUG app that it often takes three presses to turn the dishwasher off after starting the cycle:
Initially the app shows that the plug is off, although the plug is physically on – the first press reports a communications issue.
The second press reports that it’s turned the plug on, although the plug was physically already on.
Only the third press turns the plug off as was the original intent.
However today I discovered that the WIFIPLUG app is not supposed to reflect the live status of the plugs, instead one swipes to refresh and then presses to toggle status – so two actions in my case rather than three listed above.
I find the need to swipe to refresh completely non-intuitive as both Apple’s Home app and the Eve app show the live status of devices and there is no refresh concept, but I suppose it’s reassuring to know that the app is designed to work this way rather than being broken.
In the meantime, to the best of my knowledge, WIFIPLUG is the only smart plug not only supporting Apple’s HomeKit ecosystem, but also having an exposed API for smart home integration, making it uniquely suited to my application.
It can’t be very often that an energy company blogs about its customers’ achievements. Last week it happened. Octopus Energy wrote a blog entitled “How to hack your home for cheaper, greener, energy with our open API” which featured the achievements of its customers, and Greening Me got two honourable mentions.
For those not familiar with geek-speak, API is Application Programming Interface which is a mechanism by which an app, webpage or computer program may give commands to, or receive data from, another program – often a web server. Such APIs are often closed (that is that they are only available for use by the creator’s own app or webpage etc), but in this case the Octopus APIs are open so that they can be used by others (including me) to create our own apps, webpages, or other integrations to get data from Octopus. That data may be future price information for a UK electricity region or the actual consumption from a specified electricity meter for example. Octopus document their APIs and encourage others to find innovative uses for them.
Other APIs that I use were either documented privately by the manufacturers of the equipment concerned, although the manufacturer has not put the API in the public domain, or were reverse-engineered by myself or others by looking at how the manufacturer used it or at the internet traffic that it generated and working out how we could use it ourselves for a slightly different purpose. Such purposes would include controlling equipment other than by the manufacturer’s own app, or collecting data into some non-supported form.
Diversity in third party solutions using the Octopus API.
Greening Me’s first mention in the blog came under the Smart Electric Vehicle (EV) Charging section where Octopus wrote..
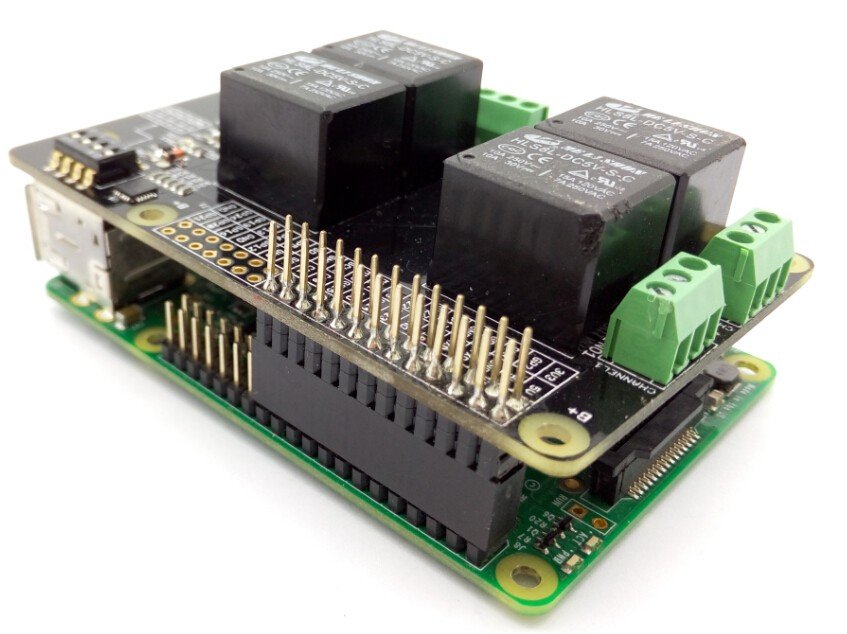
One of our own smart energy pioneers, Greening Me, has used a Raspberry Pi and an add-on circuit board with our API to switch his electric car charger on/off and set the best time for his hot water immersion heater to run. He also has solar generation and so he can direct his solar power to either his smart car charger or hot water.
The first reference
Later in the “I’ll do it myself (tech level 🌶🌶🌶)” section after describing a group of “smart home pioneers” Octopus wrote..
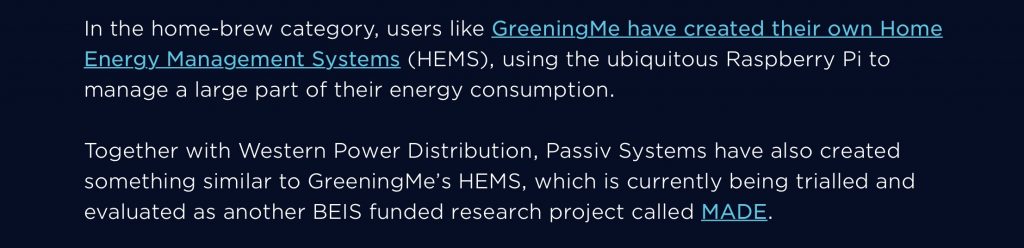
Together with Western Power Distribution, Passiv Systems have also created something similar to Greening Me’s HEMS, which is currently being trialled and evaluated as another BEIS funded research project called MADE.
The second reference
So it’s official – I’m a “smart energy pioneer” and a “smart home pioneer”. I also quite like the idea of being a “home hacker” in the positive sense of someone who makes their own home conform to their wishes. If you’d like to read the full blog post from Octopus Energy then you can do so here https://octopus.energy/blog/agile-smart-home-diy/.