Category Archives: Smart Home

Home networks

A recent move to full fibre broadband prompted a reconfiguration of my home network as the incoming cable moved to the opposite side of the house from where the incoming telephone line had been. That’s not a normal situation but it turns out that my home had previously had two telephone lines in different places, but the cable that got upgraded to fibre was not the cable that had been in use in recent time. I’ve also had further additions which prompted the idea to create a diagram of how all the devices are connected.

Home networks

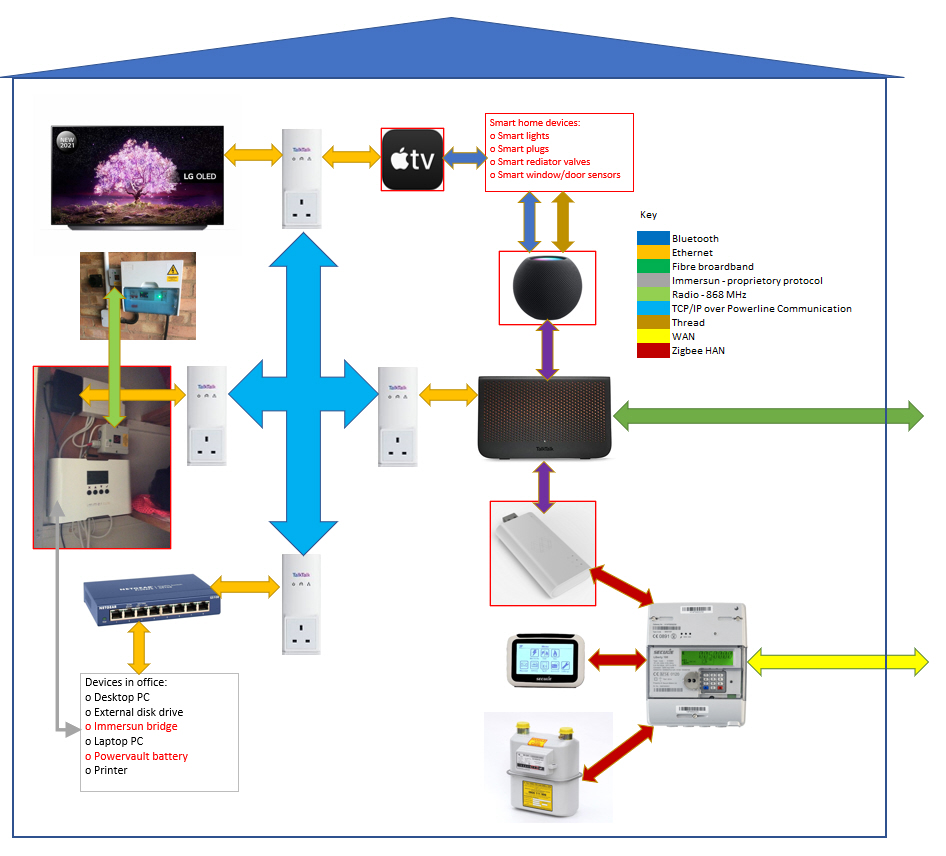
I was somewhat surprised to count as many as nine protocols/networks in use between different devices.

Like many homes we have a WiFi router where the fibre or telephone line enters the home. However over time I’ve been moving some devices from WiFi to Powerline adapters which carry the internet over the house wiring. This helps reduce issues where devices on different WiFi networks can’t communicate with each other and provides more bandwidth so more data can be carried more quickly.

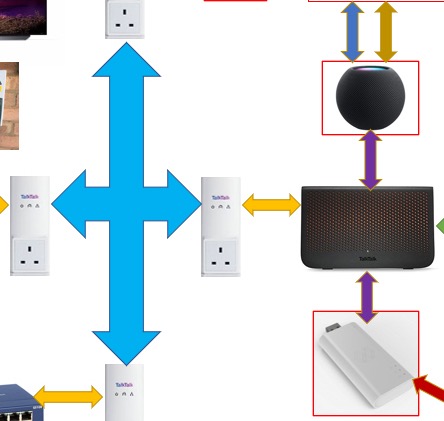
I have four Powerline adapters which communicate with each other over the house wiring and then have different internet-enabled devices plugged into them. One such Powerline adapter is in the lounge with the WiFi router plugged into it.

Smart metering and external networks to home

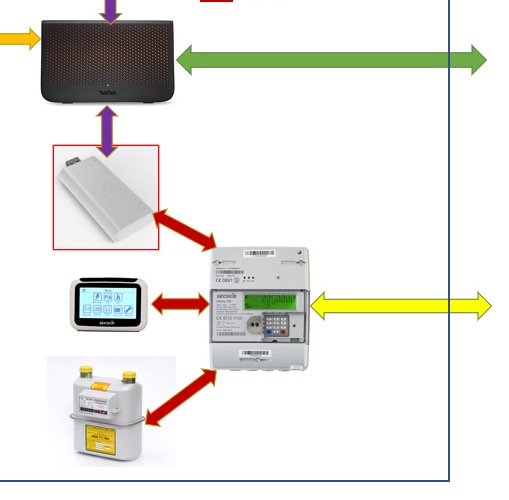
The second external connection to the home is to the smart meters. There are two networks associated with smart meters: the Wide Area Network (WAN) and the Home Area Network (HAN). The HAN (which uses a protocol called ZigBee) interconnects the meters (both electric and gas) and the in-home display IHD. The WAN communicates outside the home to send consumption data to one’s supplier via a national database called the DCC. The WAN can send data as frequently as half-hourly.

I also have an additional device known as a Consumer Access Device (CAD). The CAD connects the HAN side of the smart meter to an independent database. This offers me two two things: (i) a third party app to review my electricity and gas use and (ii) data on a minute-by-minute basis rather than at most half-hourly. The CAD acts as a bridge between the ZigBee and WiFi.

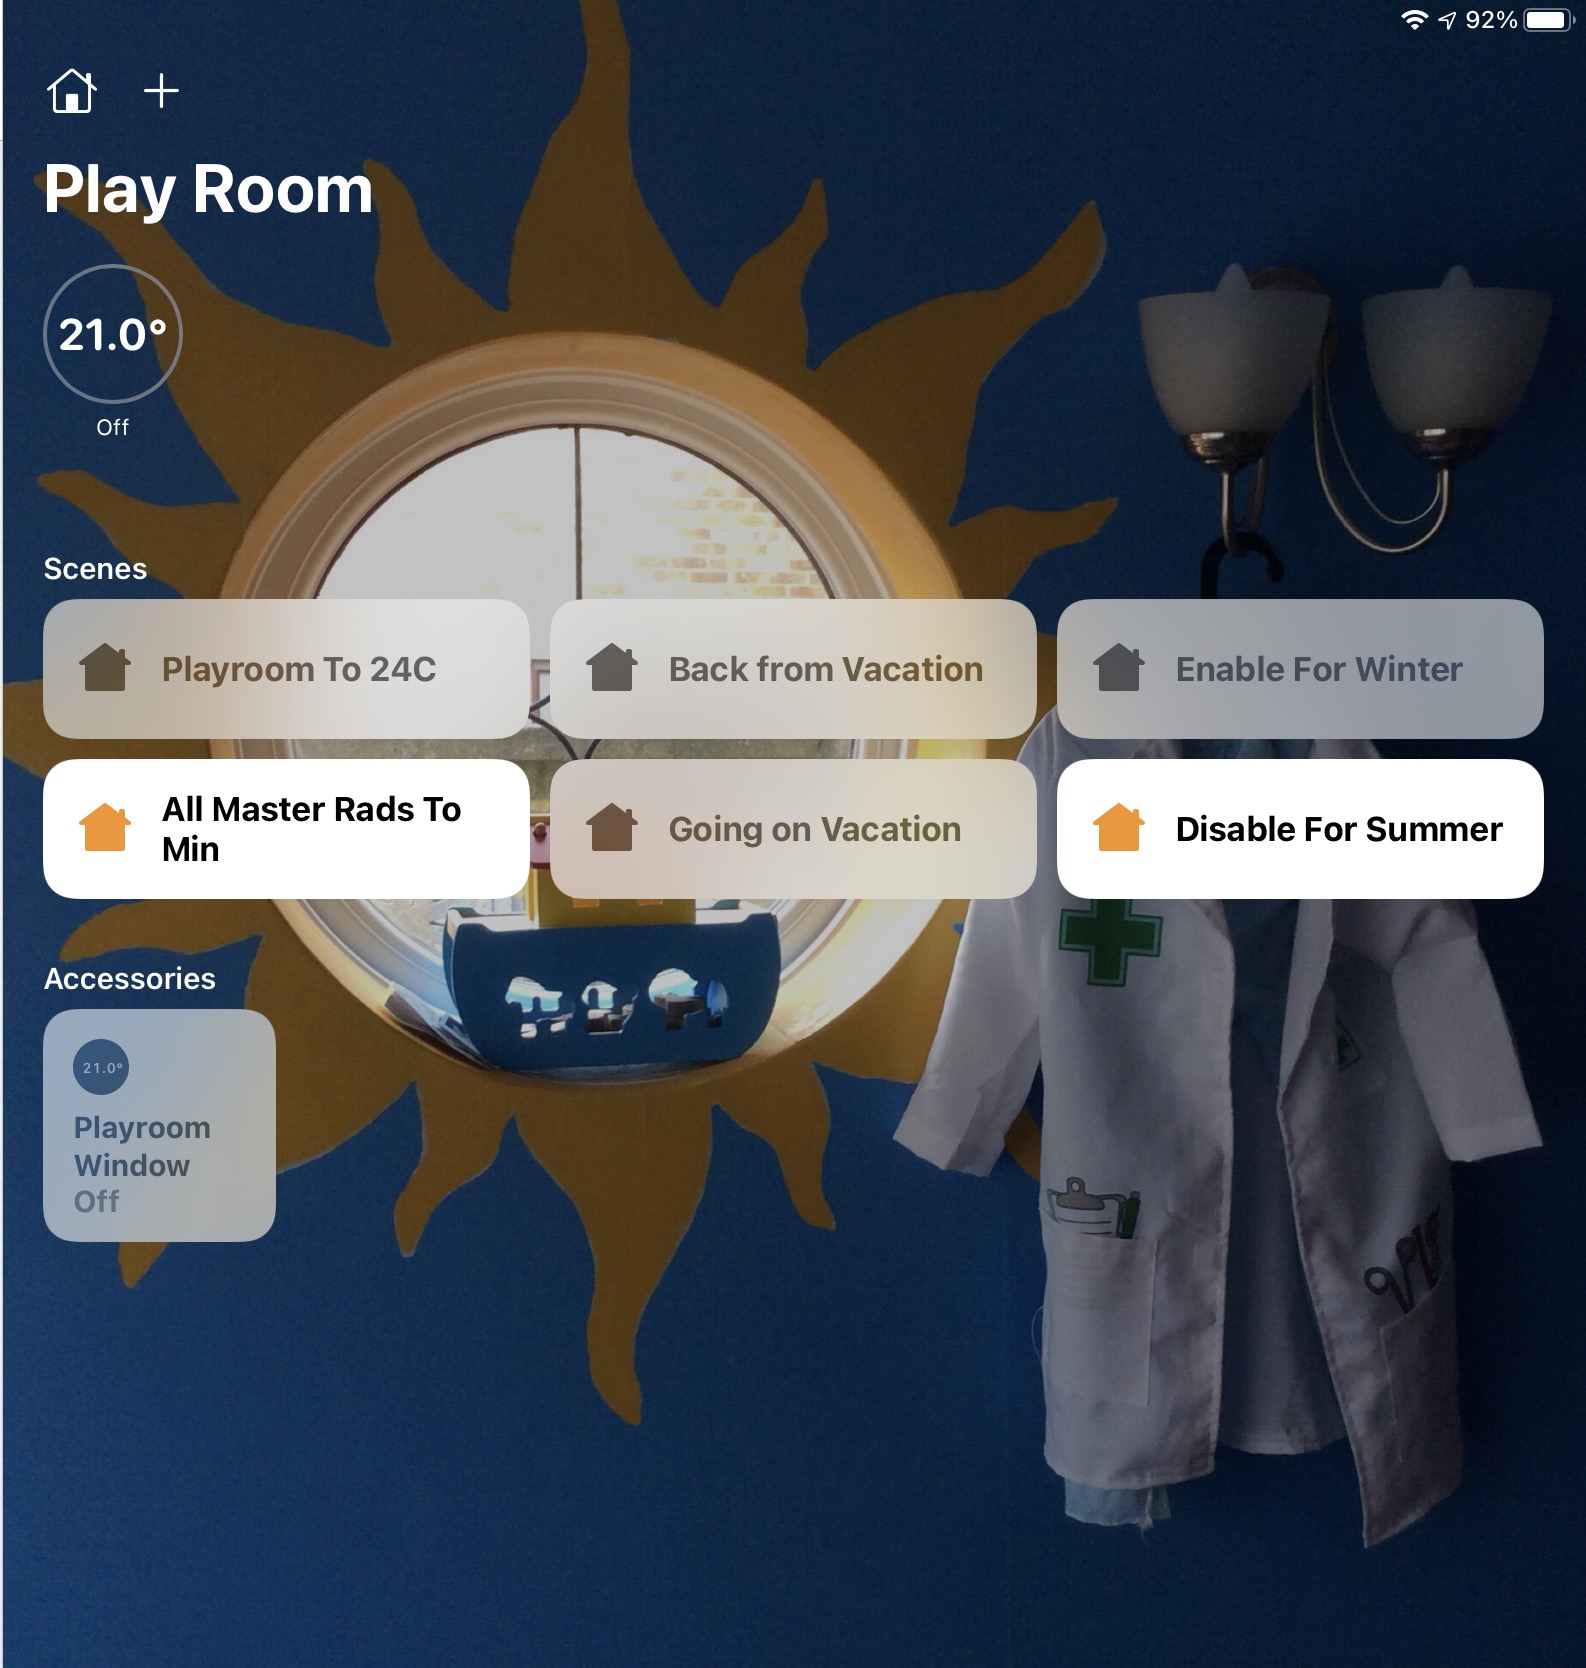
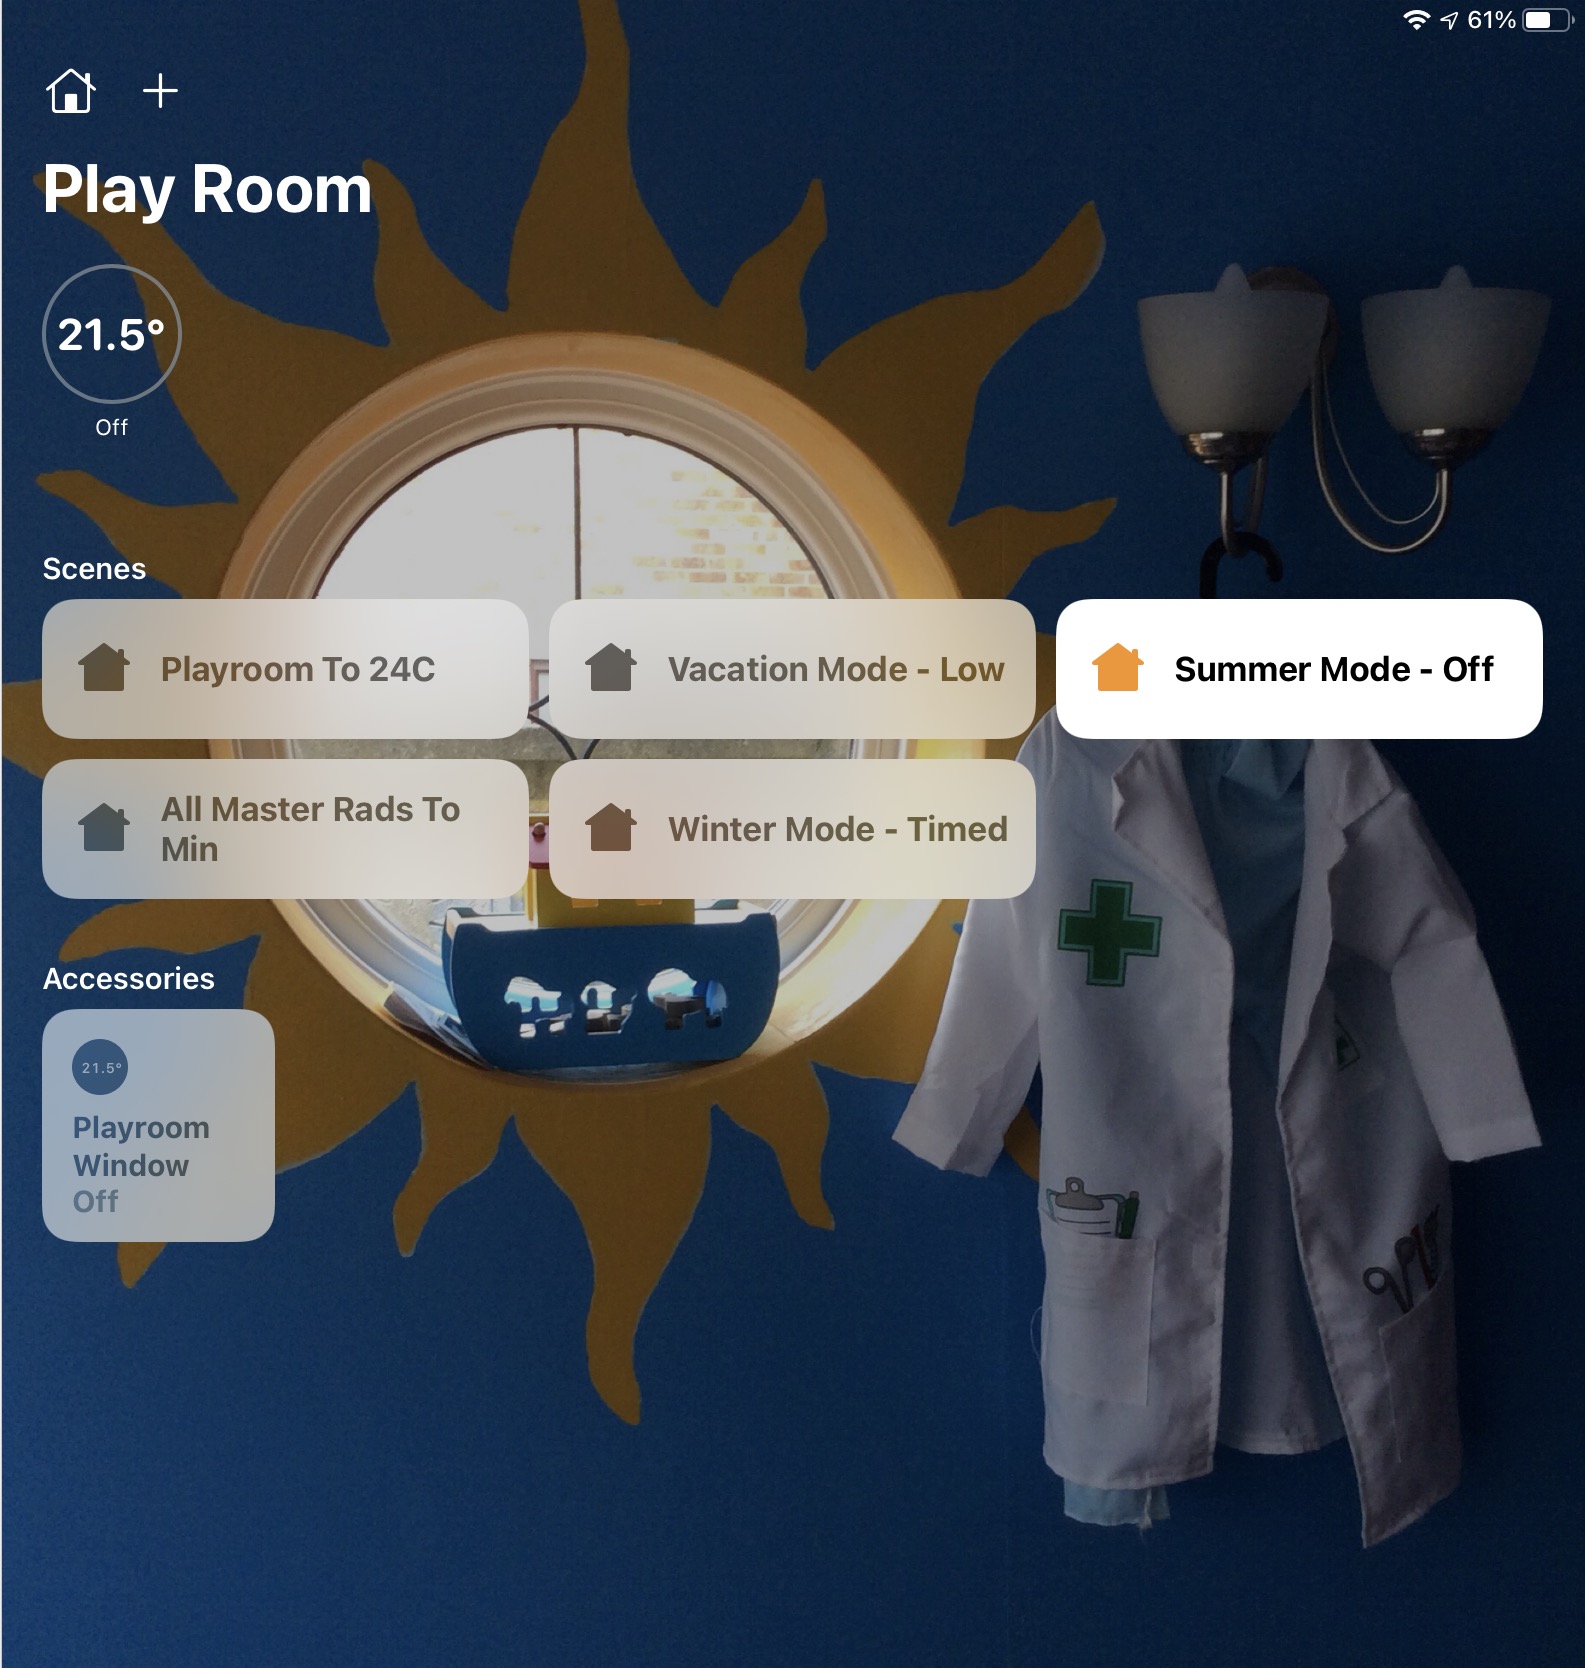
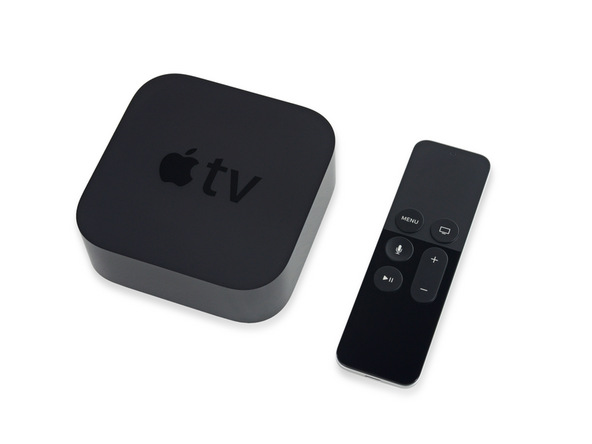
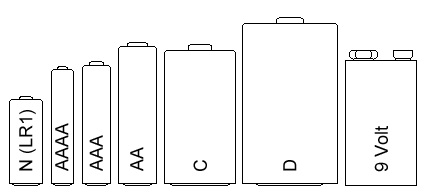
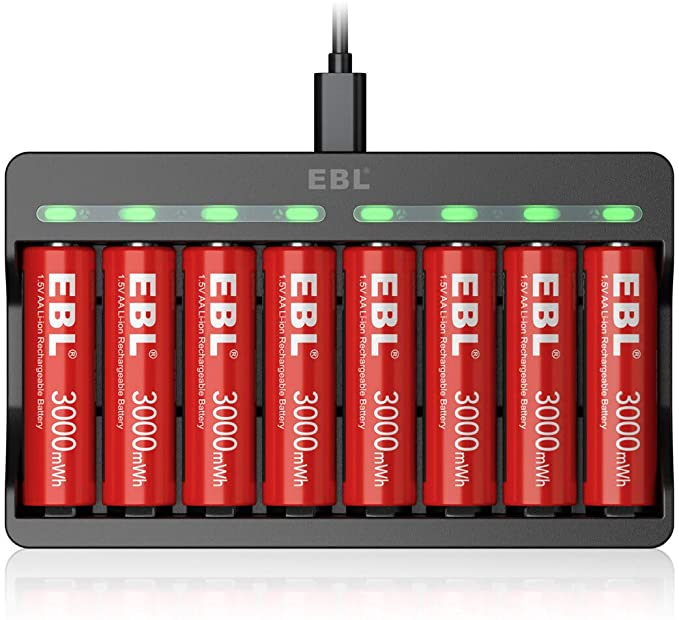
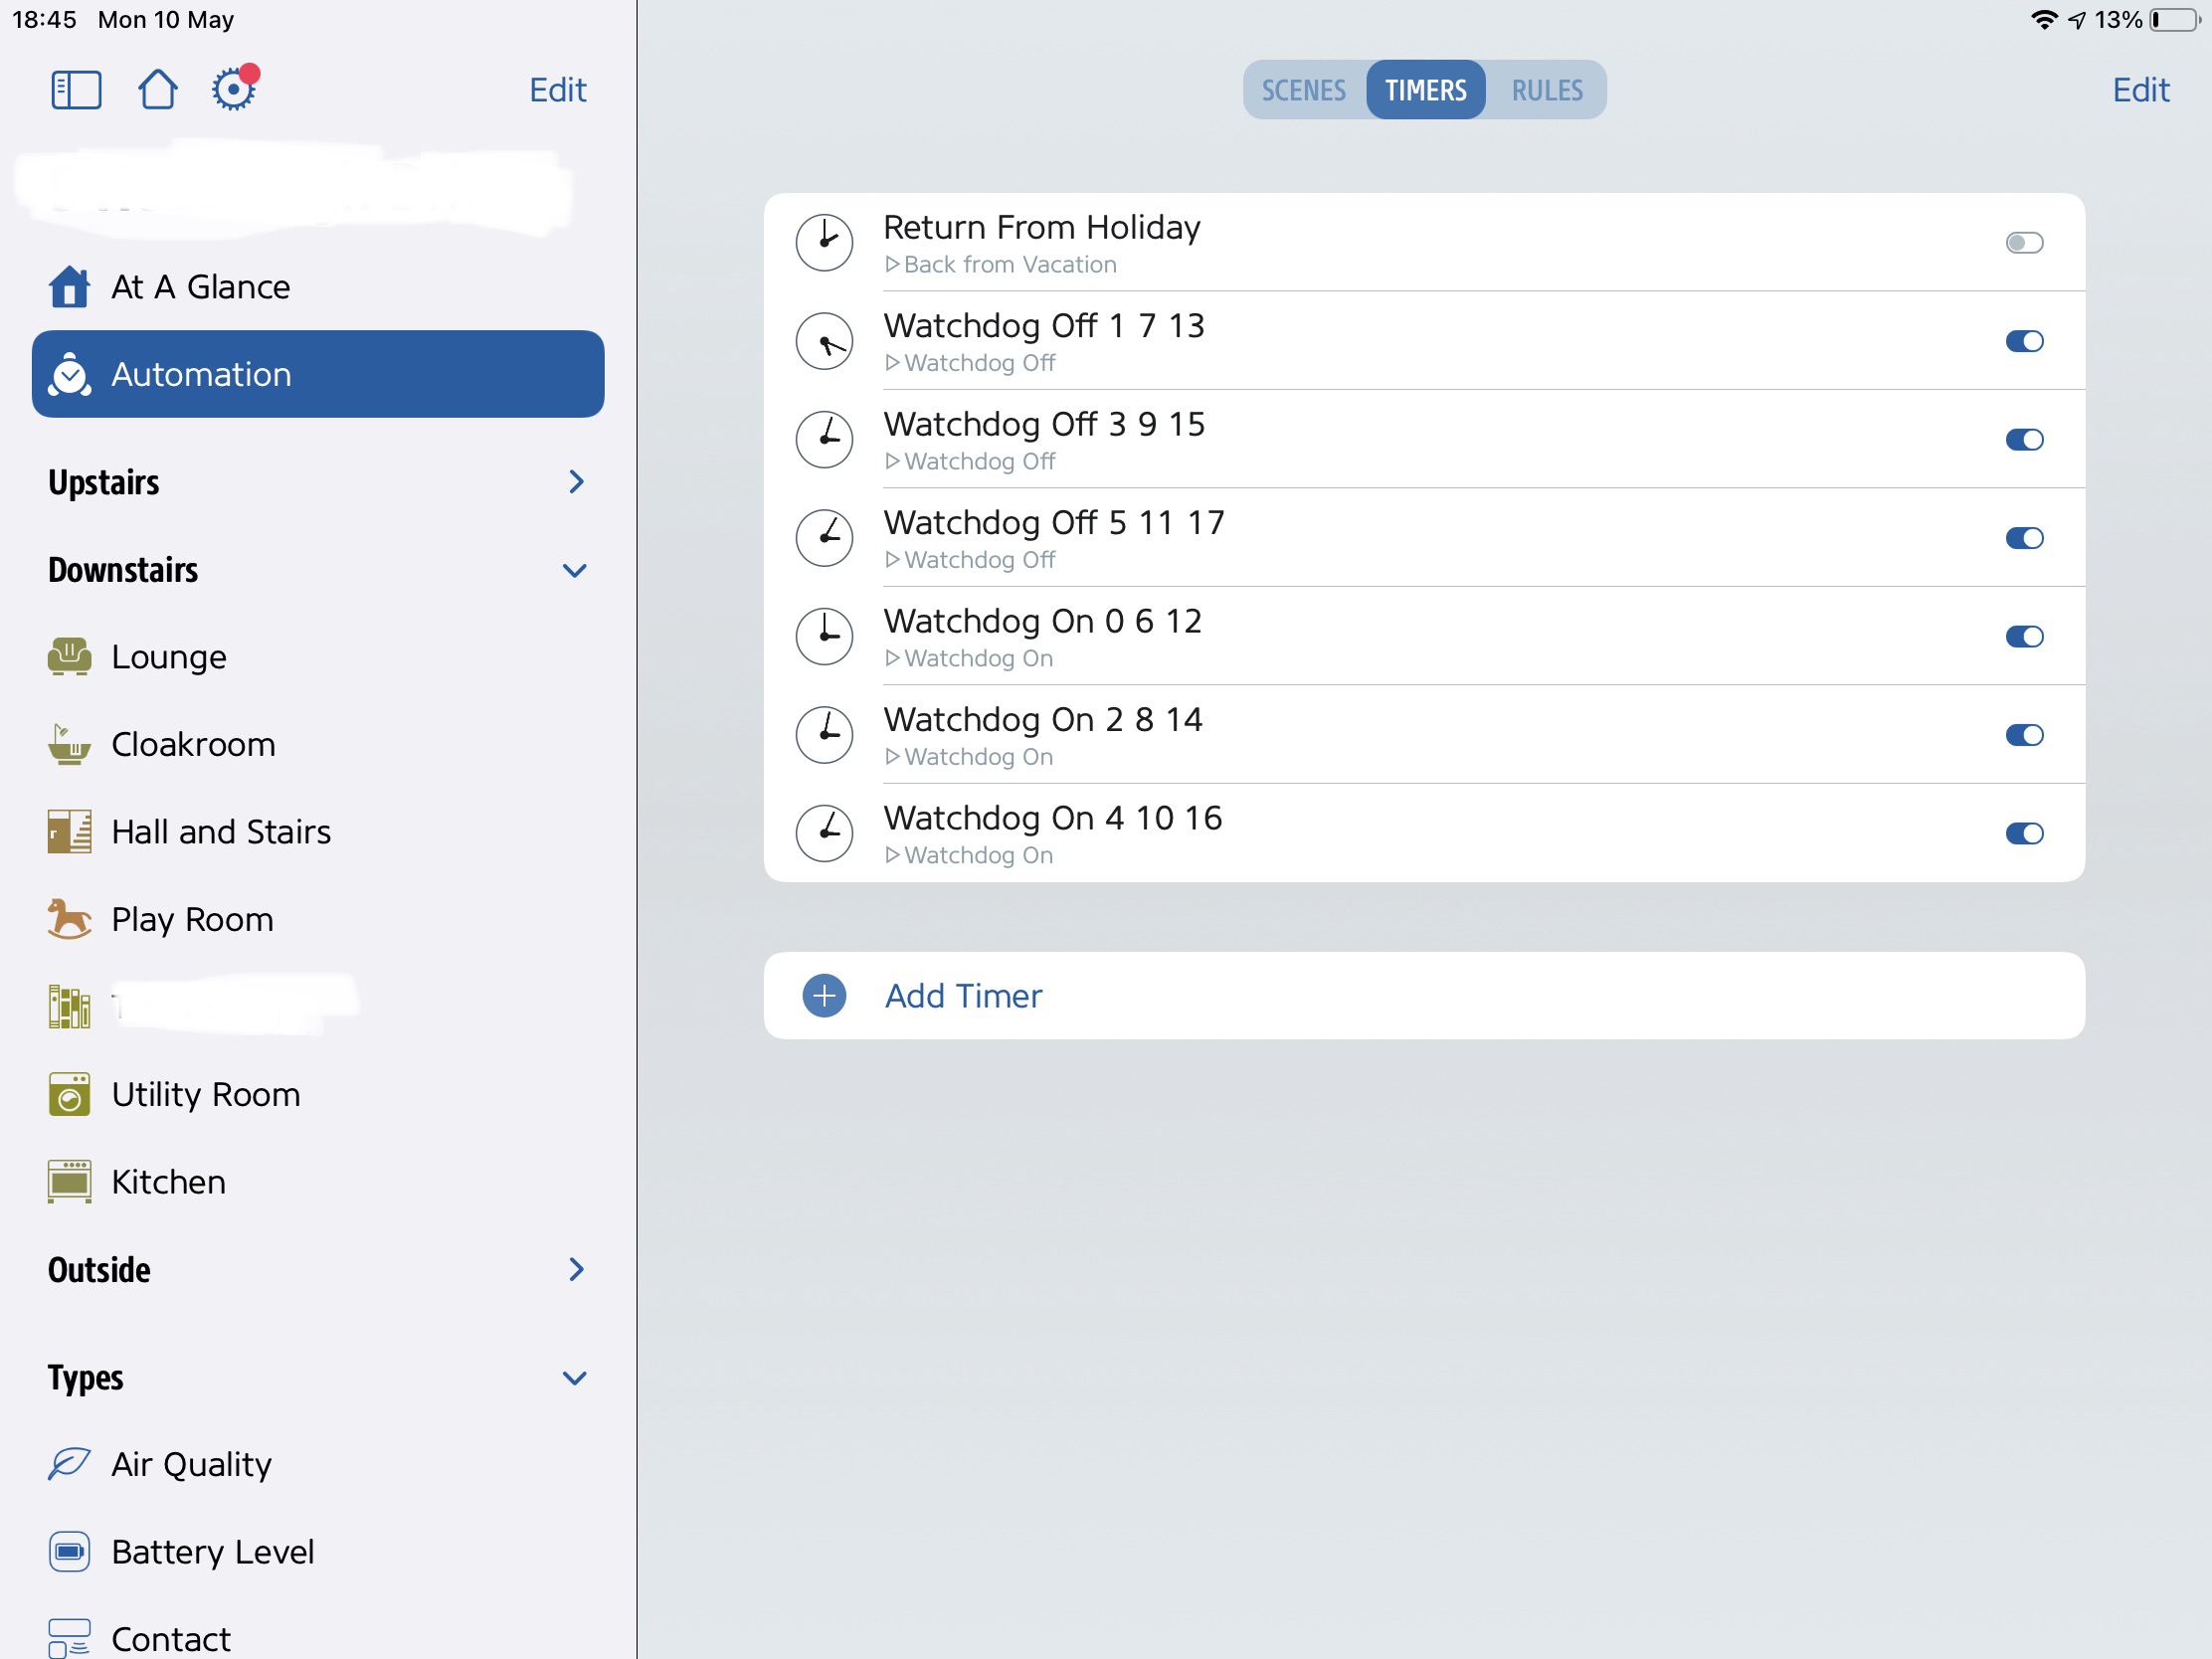
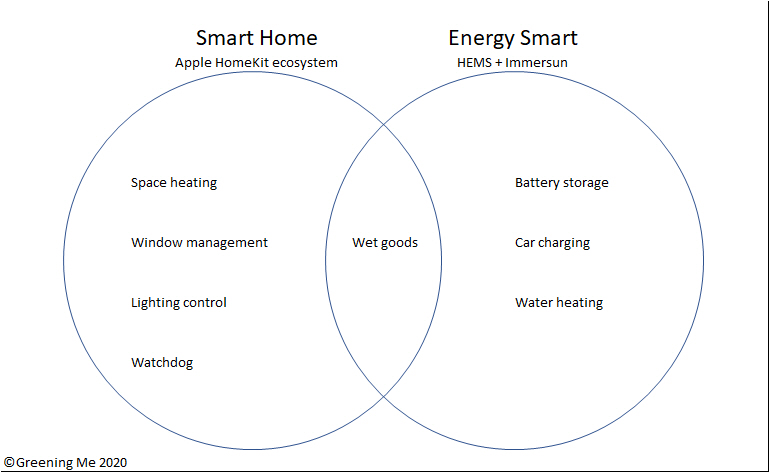
Much of my home automation, particularly home heating, uses Apple HomeKit. HomeKit runs on home hubs, rather than an external cloud server. The hubs commonly connect to the individual smart devices (such as radiators valves, smart plugs, door and window sensors etc) by Bluetooth Low Energy (BLE). The low power demand of BLE allows battery powered devices to operate for months between battery replacements. My original hub was an Apple TV.

Apple HomeKit smart devices

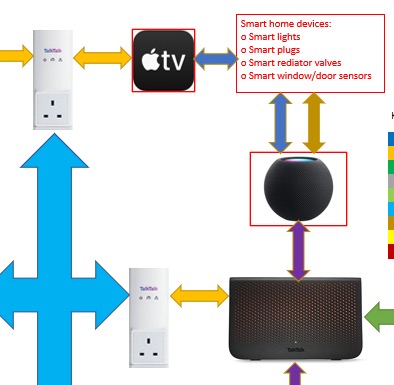
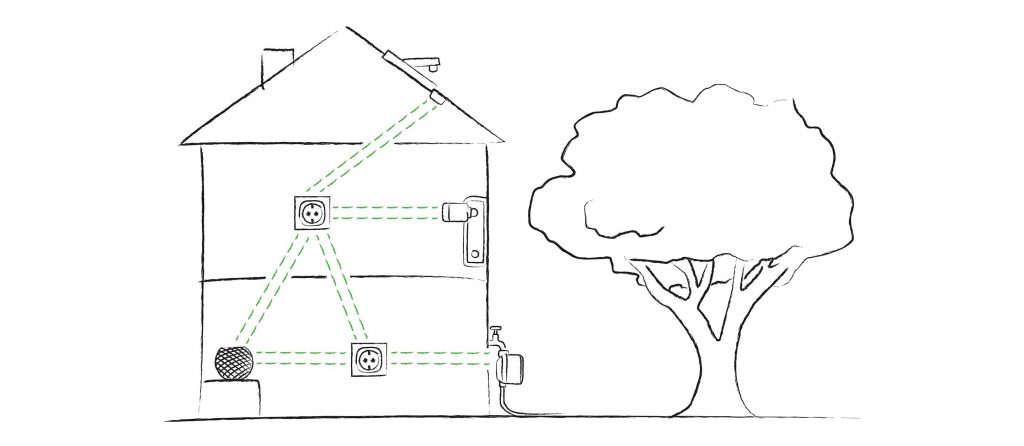
Subsequently I’ve added an Apple smart speaker which can also act as a hub. HomeKit decides which of the available hubs to put in charge, but may relay signals to and from the devices via other hubs. The smart speaker also supports a protocol called thread which allows communications to and from smart devices like door sensors via other smart devices on their way to and from a hub. Thread thus helps to extend the area that can be covered by a hub by allowing signals to and from distant sensors and actuators to travel via nearer devices rather than directly to or from hubs.

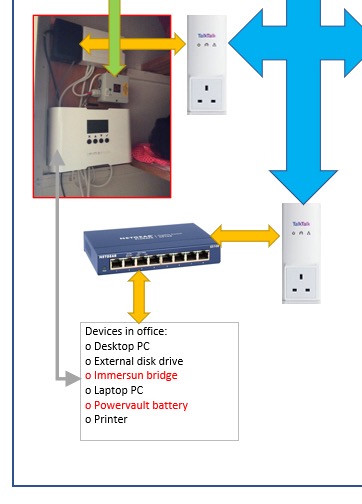
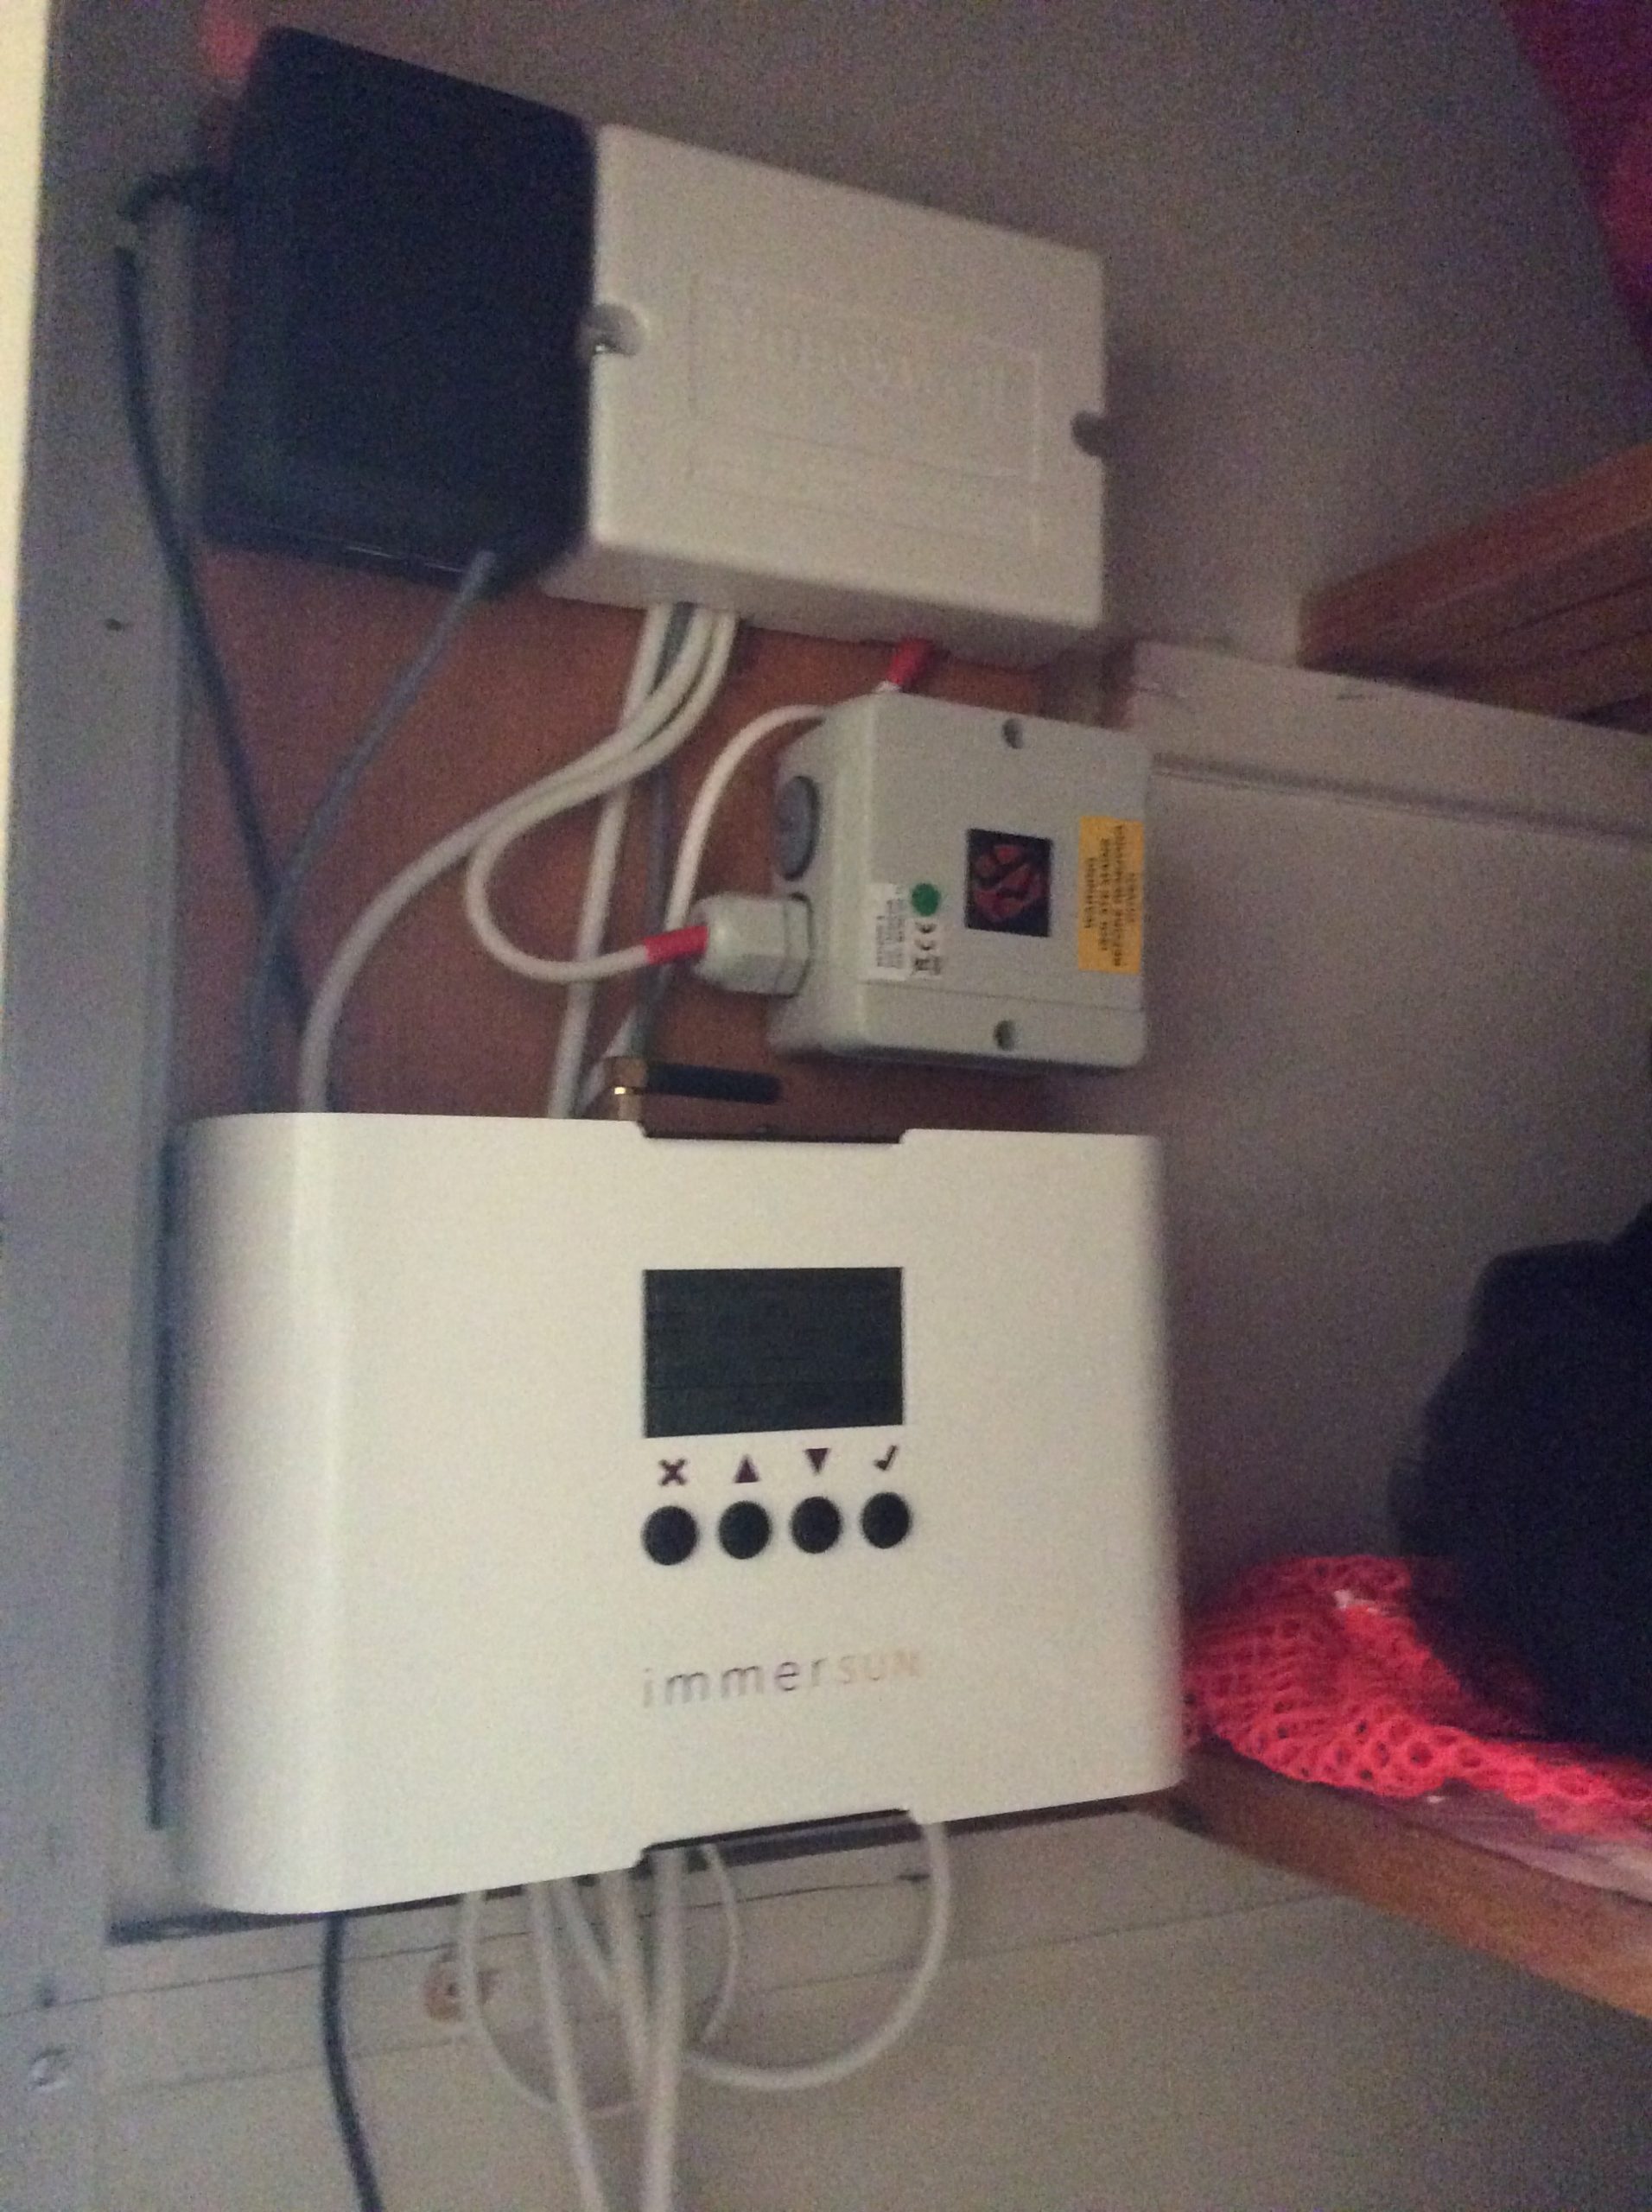
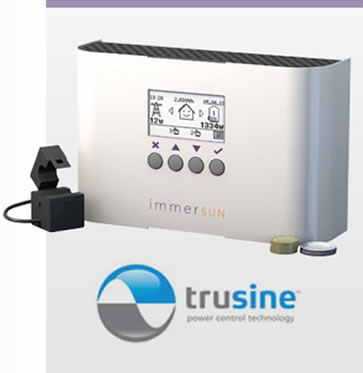
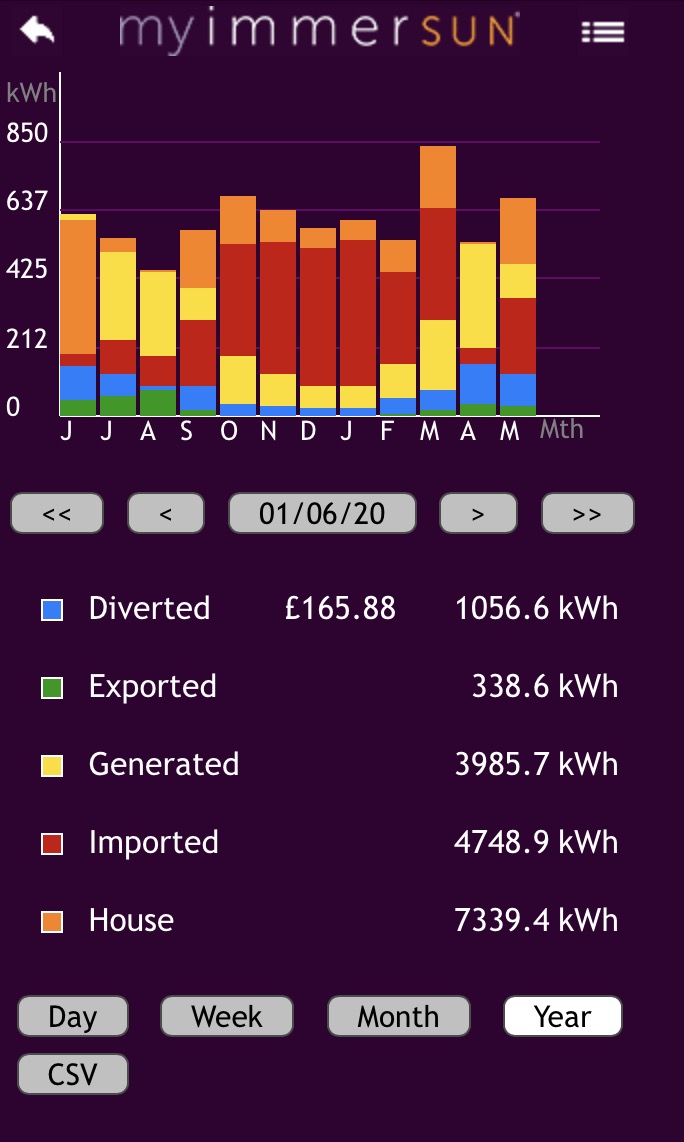
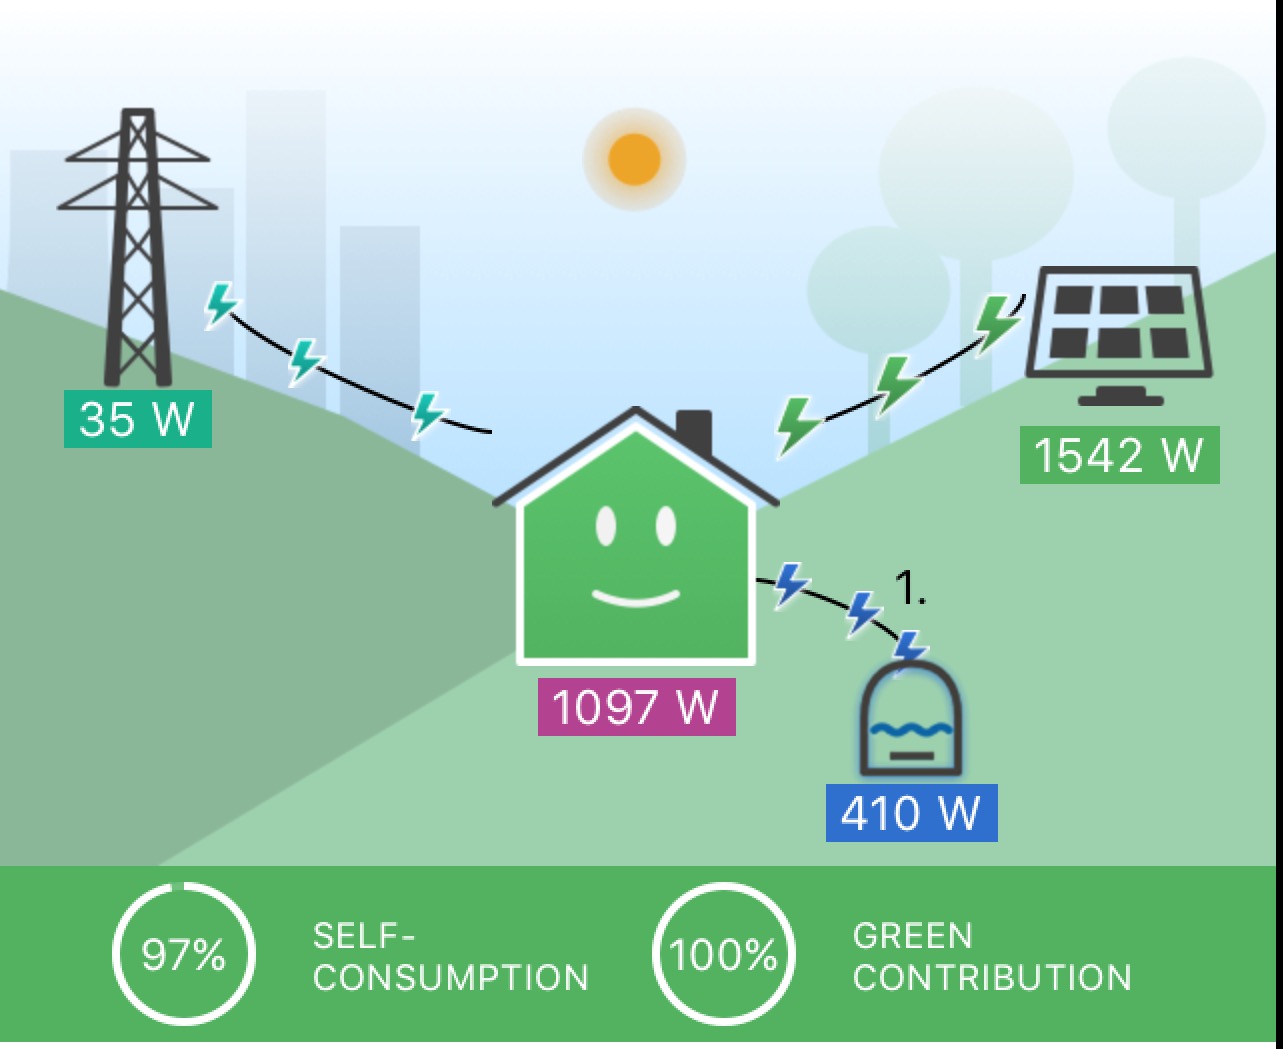
Much of my energy smart equipment is divided between my study and the the airing cupboard. Each has a Powerline adaptor allowing wired internet communication. The Home Energy Management System (HEMS) in the airing cupboard gets electricity pricing and solar predictions from the cloud and then directs the Powervault battery and the ImmerSUN diverter (partially) via the cloud. The Powervault is connected to the internet via an internet switch in my study and thence via the Powerline adapter. The ImmerSUN in the airing cupboard connects to the internet via a proprietary protocol to a bridge in my study and then onwards via the same internet switch.

The nine forms of communication are:

  1. Bluetooth – low power and low range device-to-hub communications for battery-powered smart home devices on Apple HomeKit.
  2. Ethernet – wired mains-powered internet devices
  3. Fibre broadband – high bandwidth connection from home to external internet
  4. ImmerSUN proprietary – wireless communications between mains-powered ImmerSUN devices: power diverter, bridge to internet, and remote current sensors
  5. Radio 868 MHz – radio signal to control car wallbox in garage from home
  6. Powerline communications – carries the internet over mains house wiring using mains-powered adapters
  7. Thread – an extension of Bluetooth allowing signals to travel from distant devices via nearer devices to a hub thus extending the area that a hub can cover
  8. WAN – external connection to a smart meter
  9. ZigBee HAN – internal connection between smart meters. ZigBee, like Bluetooth, is a low power low range protocol suitable for battery-powered devices (like a gas meter). It can be used for smart devices like Bluetooth, but in the form used in smart meters is secured and not accessible directly to consumers.

À la mode

I just made a change to the way my smart central heating controls works.

An example room with prior controls

Previously I had four modes:

  1. (Enable for) Summer
  2. (Disable for) Winter
  3. (Going on) Vacation
  4. Back from Vacation

These modes were the defaults from the Eve Thermo Electronic Thermostatic Radiator Valves (eTRVs). However I’ve thought for some time that there was some ambiguity around what mode the system went into when Back From Vacation was selected (Winter or Summer?) and that it would be more straightforward to have 3 modes as follows:

ModeTemperature measurementTemperature controlTemperature
set Point
SummerYesNoNot specified
VacationYesYesLow
WinterYesYesScheduled
Proposed new smart heating control Modes
An example room with current Modes

I think that this new arrangement is much more intuitive with the user just selecting which Mode they want to enter at the end of a vacation without the ambiguity of selecting Back from Vacation and then quickly following up by selecting Summer or (most likely) Winter.

Improving the Home Area Network

While generally the network at our smart home works well, I have in the past had some issues with inability to connect between devices. Many of the smaller smart devices use Bluetooth (and in particular Bluetooth Low Energy – BLE) because battery devices lack enough energy capacity to run WiFi with adequate battery life, but we have had some issues with WiFi-connected devices. Intermittent WiFi issues included:

  • connection between all HomeKit hubs (2 x Apple TV + iPad)
  • connection to an external HomeKit WiFi bulb or WiFi smart plug
  • connection from iPad to Raspberry Pi HEMS

After some head-scratching I concluded that the issue relates to my WiFi network or indeed networks. Like many people I have dual band WiFi – 2.4 and 5 GHz. The 2.4 GHz is supported by more devices, carries for a longer distance, but can carry less data; while the 5 GHz can carry more data, but is supported by fewer devices and has less range. Devices with 5 GHz capability can generally choose either frequency, but many cheaper devices are 2.4 GHz only.

It seems to me that devices on the 2.4G WiFi network can reach each other, hardwired ethernet devices in the home, and the external internet. Similarly devices on the 5G WiFi network seem to be able to reach each other, hardwired ethernet devices in the home, and the external Internet. However devices on the 2.4 GHz and 5 GHz WiFi networks don’t seem to be able to reach each other. I couldn’t find any setting in my router that might join or separate these WiFi networks.

The solution that I came to was Powerline adaptors. Powerline adaptors extended a wired ethernet connection over the existing mains electrical wiring of the home rather than require new dedicated cables. Typically these Powerline adaptors are sold in pairs – one to be wired to the router and one to a remote device – but it’s possible to pair additional units. Indeed I currently have three units from two different manufacturers all interlinked:

  1. In my study connected to the router.
  2. In the lounge connected to the Apple TV.
  3. in the airing cupboard connected to the HEMS (as illustrated above).

The effect of this is to put the Apple TV on the wired ethernet with the result that the iPad (however connected to the internet) can reach it as can the external HomeKit WiFi bulb on 2.4 GHz. Similarly, with the Raspberry Pi hardwired, then the iPads can reach it regardless of their internet connection, rather than only when the iPad was also on 2.4 GHz.

The result seems to be a significant improvement in robustness and it didn’t even cost me anything as I had two pairs of Powerline adaptors already from prior projects.


Powerline adaptor

From back to front:

  • Mains socket incorporating USB power supply for Raspberry Pi HEMS
  • Black USB power lead to HEMS
  • Powerline adaptor connecting HEMS to Powerline network with mains socket
  • Yellow Cat 5 ethernet cable to HEMS
  • Mains plug with ‘Do not unplug’ label supplying power to HEMS-driven relays and RF Solutions Mainslink radio transmitter to car charger.

From top to bottom:

  • Raspberry Pi HEMS (black box) incorporating relay HAT
  • 10-way junction box (white box) typically employed for wiring central heating controls
  • RF Solutions Mainslink radio transmitter
  • immersun solar diverter
Raspberry Pi as HEMS
Smart controls – HEMS and immersun.

Payback time

It been over a year now since I last reviewed what return I was getting on my investment in energy smart technology – solar panels, battery storage etc – so I think an update is due. This time I’m going to take the input data from my immersun system – one year of data from start of June 2020 to end of May 2021.

Diverted – this is where the immersun sends any surplus solar electricity to my immersion heater to make hot water. In 2020/1 we diverted 1056.6 kWh to hot water saving gas at 2.82 p/kWh. However the gas boiler isn’t 100% efficient losing heat both via the flue to the outside world and also via the hot water pipes to the home rather than hot water. If we assume 80% efficiency at the tank then 2.82 p/kWh as gas at the boiler is 4 p/kWh as heat in the tank. 1056.6 kWh at 4 p/kWh saved £37.25.

Exported – this is where I’m unable to use the solar power that we generate and it overflows into the grid. I’m not paid for Export so this is worth nothing to me.

Generation – this is the energy that we generate in the solar panels. I’m on the UK’s legacy Feed-in Tariff (FiT) scheme which pays me to generate electricity. In 2020/1 I was paid 14.65 explicitly for every kWh that I generated. I also received deemed (rather than metered) Export which paid 5.5 p/kWh on 50% of the kWh that I generated (which is where the ‘deemed’ part comes from). 5.5 p/kWh on 50% is equivalent to 2.75 p/kWh on 100% of the Generation making my revenue 17.4 p/kWh per kWh generated or £693.51 on the 3985.7 kWh that I actually generated.

Imported and House – these are respectively the electricity that I buy from the grid and that which I used within the home including appliances and car charging, some of which will comes from my own solar panels. The difference between House and Imported is the electricity that I used from my solar panels which would otherwise have been bought from the grid. If I assume that each kWh that I use from my solar panels avoids buying a kWh of electricity from the grid at 16.36 p/kWh (current Energy Saving Trust value for the average UK electricity price) then I avoided buying £423.81 of electricity by using the output of my solar panels.

Diverted1056.5 kWh*£0.04=£37.25
Exported338.6 kWh*£0.00=£0.00
Generated3985.6 kWh*£0.17=£693.51
Imported4748.9 kWh*-£0.16=-£776.92
House7339.4 kWh*£0.16=£1,200.73
Total£1,154.56
Return on smart energy investment @ 16.36 p/kWh grid price

With an investment of £8,670, £1,154 represents 7.5 years to pay back the capital invested.

I’m actually on a smart tariff so my electricity cost in this period at 8.05 p/kWh was significantly less than the UK’s average 16.36 p/kWh. This lower price will arguably reduce the value of the energy generated by the solar panels for self-consumption, but equally the ability to maximize the value of a smart tariff is itself a saving.

Diverted1056.5 kWh*£0.04=£37.25
Exported338.6 kWh*£0.00=£0.00
Generated3985.6 kWh*£0.17=£693.51
Imported4748.9 kWh*-£0.08=-£382.29
House7339.4 kWh*£0.08=£590.82
Total£939.29
Return on smart energy investment @ 8.05 p/kWh grid price (excluding the tariff benefit itself)

Using my actual average energy price rather than the higher UK average grid price pushes down the return by over £200 (£929.29 versus £1,154.56). However the costs of buying the imported 4,748.9 kWh falls by £394.63 through the tariff benefit, increasing the annual return to £1,333.93, and reducing the payback period from 7.5 to 6.5 years.

Thus, had I invested in this technology at one time back five and a half years ago and shortly after we moved to this house, then we’d have been in sight of payback with 1 or 2 years left. In practice of course I’ve made the investments at different times (solar first five and half years ago, battery around a year later, smart tariff later still), so my payback will be achieved a little later.

A snapshot of the ImmerSUN diverting to hot water

Some other statistics:

  • Of solar panel output:
    • 91.5% replaced bought energy (self-consumption)
    • 65.0% replaced bought electricity
    • 26.5% replaced bought gas for water heating
    • 8.5% was exported to the grid
  • Of incoming electricity:
    • 54.4% was from the grid
    • 45.6% was from the solar panels (“green contribution” in ImmerSUN’s terminology)

Batteries not included

Recharge your batteries

We have a lot of batteries. The kids’ toys seem to use endless quantities of AA and AAA batteries plus many of my HomeKit smart devices including sensors and radiator valves are battery powered (typically AA or 1/2 AA). Over the last few years I’ve been replacing disposable batteries with rechargeable batteries to reduce waste. So far every device has worked successfully on rechargeable batteries (even when the manufacturer didn’t recommend them) although in some cases low battery warnings are triggered almost continuously since the Nickel Metal Hybrid (Ni-MH) rechargeable batteries are slightly lower voltage than regular disposable alkaline batteries (1.2 versus 1.5 Volts).

Common battery sizes

Last year I came across a Lithium AA battery that had potential to avoid such issues. Normally Lithium cells have voltages in the 3-4 Volts range, but these batteries have internal voltage regulation to reduce this down to 1.5 Volts. They need a special charger, but have the potential to eliminate the almost continuous low voltage messages.

EBL AA batteries and charger

I’ve now been using the first of these for six months. They have indeed eliminated the low battery messages. I still recharge the batteries at the end of every quarter regardless of whether I have a low battery warning or not. For the Ni-MH batteries they get replaced because the low battery warning is on most of the time anyway, while for the Lithiums I’m anticipating that the voltage may dramatically collapse not leaving time to change them after the low voltage warning is triggered. I now have three sets of eight which is enough for all my Eve Thermo smart radiator valves (eTRVs).

They are currently available via both Amazon and eBay, although Amazon seems to have the better prices whenever I’ve looked.

My sole criticism of these batteries is that they only seem to be available in sets with a charger, and not as just cells, so I now have three chargers.

I now have rechargeable Lithium cells for all my Eve Thermos (2 x 1.5V AA each) and Eve Door and Window sensors (1 x 3.7V 1/2 AA each). The Eve Room and Eve Motion sensors don’t seem to mind the lower voltage Ni-MH cells.

You can teach an old Watchdog new tricks

My home unusually uses HomeKit smart automation for central heating control among other things. One feature that I’ve not seen documented elsewhere is use of a watchdog to improve robustness of the automations. Many people of course will use HomeKit as a fancy remote control, but in my case HomeKit automations have an important role in heating control linking heat demand from rooms to enabling the boiler to provide heat. It’s thus important to me that this link works reliably. However in my experience sometimes changes in state can be missed leaving the boiler not running when it should be, or running when it shouldn’t be, an error which could last for hours.

Some two-and-a-half years ago I created a means to improve the robustness of such automations. My watchdog is a HomeKit smart plug which cycles on and off periodically. Two timers alternately turn the plug or or off every few minutes. The change of state of the watchdog is used as a second trigger for the rules in the automations causing the rules to be reevaluated every few minutes.

To illustrate what this achieves let’s imagine that the HomeKit ecosystem misses one trigger in ten or 10% of triggers. That would mean that one night in ten the boiler would fail to turn off when the last radiator valve closed, and would instead run all night. With the watchdog concept the rules are re-evaluated every few minutes, not just at the moment a valve closes. Thus, within a few minutes the rules are evaluated again and then ninety percent of the missed ten percent of events corrected – the error rate is now down to one percent from ten percent. A few minutes later the rules are evaluated a third time and ninety percent of the remaining one percent of errors corrected – the error rate is now a tenth of one percent or once in every thousand days. The risk of a continuing error state thus becomes vanishing small in minutes.

Previously the period of the cycle was five minutes i.e. the timer repeating an on/off cycle every five minutes. Five minutes was chosen as that’s the minimum cycle time available in the Eve app that I use to write rules. Today I realised that I could improve this significantly.

New HomeKit timers

The illustration above shows the new solution. Here I created 3 on and 3 off rules which each repeat every six minutes, which causes the state of the watchdog to change every minute..

  1. watchdog off (off rule #1)
  2. watchdog on (on rule #1)
  3. watchdog off (off rule #2)
  4. watchdog on (on rule #2)
  5. watchdog off (off rule #3)
  6. watchdog on (on rule #3)
  7. watchdog off (off rule #1).. and repeat indefinitely.

The illustration below shows a typical rule which turns off the watchdog and repeats every 6 minutes.

Example rule

The net result is that my watchdog smart plug now turns on every even minute and off every odd minute which I think provides the minimum possible delay before the system responds after any missed change of state.

The power of mesh

Two recent manufacturers’ announcements indicate that shortly the Apple HomekIt smart home ecosystem could be getting even more robust. The announcements concern threading which creates a mesh between smart home devices. Apple have announced that the HomePod mini smart speaker will be their first device with threading capability, while Eve have announced that an imminent software update will add this capability to both Eve Door and Window and Eve Energy devices (of which we have six in total now).

The way the ecosystem currently works is that the hubs (of which we have two, both Apple TVs) communicate to each other via WiFi (or potentially wired Ethernet, both in orange) while my many smart home devices typically communicate with the nearest hub by Bluetooth (in dark green). This arrangement works well while both hubs are online, but if occasionally a hub is having issues then some devices are out-of-reach until the functionality of the hub is restored as Bluetooth struggles with the range.

However the new threading capability allows some Bluetooth devices to form a mesh (in cyan) where messages can can be passed by multiple routes from one thread-enabled smart home device to another and not just directly to and from hubs. Non-threading Bluetooth devices can then communicate to a nearby thread-enabled device (rather than a comparatively distant hub) and their messages have multiple alternative paths via the thread-enabled devices to eventually reach a hub.

BLE devices communicating to HomePod Mini hub via thread-enabled devices.

I had previously considered the Eve Extend as device capable of extending coverage to distant Bluetooth devices, but I see threading as much more attractive for me as follows:

  1. Eve Extend is configured to relay signals from a predefined set of devices (which threading does not require pre-definition),
  2. Eve Extend only covers some devices and in particular not my first-generation Eve Thermos (while threading supports any device, although only a limited range of devices form part of the mesh), and
  3. Eve Extend device allocation is fixed (so if the Extend goes down the connection goes down) but threading is dynamic, so if a threaded device goes offline (such as due to a flat battery) then an alternative path may be found via other devices in the mesh.

Eve Extend does however work differently in that it sits between BLE devices and WiFi and could thus extended coverage over a greater distance since WiFi carries further than BLE.

Eve Thermo Versions 1 and 2 compared

We currently have eight Eve Thermo electronic thermostatic radiator valves (eTRVs) in service. These valves allow us to set heating schedules and target temperatures for rooms individually, for example don’t heat the lounge of weekdays before the evening or don’t heat the playroom after the children’s bedtime. All the existing valves are the original version.

However I’ve just bought two more valves with a view to expanding control to the bathroom and ensuite. I want to add these rooms as they tend to be rooms where the windows are left open (allowing heat to escape) and the ensuite in particular is often too hot and difficult to it’s difficult to regulate the temperature as it’s immediately above the boiler. These new valves are the second generation. So what are the differences between versions?

The two versions are very similar if not the same size. The most obvious difference is that the new version has a small display and buttons allowing the temperature to be adjusted. A setup item allows the orientation of the display to be adjusted so that the temperature display is the preferred way up. The display illuminates briefly when the buttons are used to adjust the temperature.

However there are other small differences:

  1. Vacation mode. The older version has a vacation mode for winter vacations when the schedule is disabled, but heating will be enabled below the lower temperature set point. The newer version doesn’t seem to have this mode, so my existing vacation scene sets these individually: mode = on, schedule = off, temperature = 10 Celsius to achieve the same result.
  2. Lower temperature set point. In the older version the minimum possible scheduled temperature stored in a valve was 10 degrees, but a scene could set a lower temperature down to 5 degrees. I use this facility overnight to stop a rarely-used room pulling on the heating overnight in winter while still providing frost protection. However the newer version seems to have a common minimum temperature of 10 degrees. I have thus modified and renamed a scene that previously explicitly set 5 degrees to set minimum temperature, that is either 5 or 10 degrees according to valve generation.

I plan to install my two new valves in the lounge which has two radiators, and use the displaced older valves in the bathroom and ensuite.

After installation we’re now up to 10 eTRVs divided between 8 rooms (bathroom, cloakroom, daughter’s bedroom, ensuite, lounge x2, master bedroom x 2, playroom and wife’s study). Most of these rooms have individual schedules; while bathroom, cloakroom and ensuite heating is on when any other room heating is on. The latter also have window sensors and are disabled while the window is open, while the lounge also has a movement sensor which curtails heating in the evening if no movement is detected (which otherwise provides heating for my wife’s late film viewing).

Valve position for the ensuite eTRV.

The image above shows the operation of the eTRV in the ensuite which was previously the room with the greatest difficulty in maintaining an appropriate temperature – often being too hot as almost directly above the boiler. Here we can see brief morning openings and much longer evening openings on weekdays, and heating all day on Saturday. In all cases the valve initially opens wide (60-80%) to warm the room up, and then gradually closes over time until the temperature is maintained with a relatively small opening (~10%).

The system has several modes:

  1. Summer – which provides temperature monitoring, but no control.
  2. Vacation – which provides minimum temperature control, but no schedules.
  3. Winter – which provides temperature scheduling with two schedules available – one for working days and one for non-working days (not necessarily weekdays and weekends) selected from a standard Apple calendar.

Automations in HomeKit

Last night I was refining some of my HomeKit automations (rules) and it occurred to me that it might be an idea to capture some tips from the last few years.

HomeKit versus HEMS functions

I currently have around 30 automations delivering:

  • Space heating – 8 eTRVs / smart valves linked to a smart plug for boiler control and both movement and window sensors.
  • Window management – 4 window sensors and a movement sensor indicating via colours smart bulb when windows are left open (typically checked prior to leaving the house)
  • Lighting control – dusk-to-dawn lighting with colour-override by window management.
  • Watchdog – robustness aid.
  • Wet goods – control and dishwasher and washing machine in conjunction with HEMS.

In total I currently have:

  • 8 smart radiator valves (eTRVs)
  • 6 smart plugs
  • 4 door / window sensors
  • 3 smart bulbs (two coloured + 1 on/off)
  • 2 movement sensors
  • 1 environment sensor (temperature, humidity, air quality)

So, what are my tips:

It Is much more intuitive to write rules in the Eve app.

  • The free Eve app can pretty much do everything that Apple’s own Home app can do for HomeKit devices (not just Eve’s own devices). The construction of rules in the form: IF {any of one of more triggers} AND {all of none or more conditions} THEN {set one of more scenes} is very intuitive in the Eve app.
  • Eve also allows rules to be names, whereas Apple’s own Home app sets names to a trigger condition, so if you have many rules as I do with common triggers then you end up with a confusing list of rules with duplicates names which need to be opened to tell one from another.
A rule in the Eve app.

Comparison with conventional logic. Simple IF rules are very straightforward: IF {any of one or more triggers} THEN {set one or more rules}, however AND rules take a bit more thought: IF {list of AND conditions} AND {same list of AND conditions} THEN {set one or more scenes}.

A watchdog makes execution more robust. HomeKit rules are triggered by changes of state such as going from open to closed or from movement to no movement, but if some some reason a trigger is missed you may have the wrong scene set for hours. My watchdog rechecks rules every 5 minutes as described here.

AND rules. AND rules may be converted to use the watchdog principle by simply adding an additional trigger to reference the change of state of the smart plug used for the watchdog: IF {original list of AND conditions + new smart plug trigger} AND {original list of AND conditions} THEN {set one or more scenes}.

Simple IF rules. IF rules with single triggers are easily converted. The same principle applies to AND rules: If {original single trigger + new smart plug trigger} AND {original single trigger} THEN {set one or more scenes}.

Complex IF rules. IF rules with multiple triggers are more involved to convert to the watchdog principle. If you just add the smart plug to the trigger list as per the earlier AND paragraph then the rule triggers every time the smart plug cycles. If you were to add the other triggers to the conditions list then the rule would become an AND not an OR. Instead to convert an IF with multiple triggers then it needs to be converted to multiple rules – one for each original trigger condition – all driving the same scene. Each of the new rules is an IF with a single trigger as per the earlier paragraph. The existence of multiple rules setting the same scene(s) creates a multiple-trigger IF.

Multiple hubs. Having multiple hubs (in my case two Apple TV’s) can make the system more robust both during occasional software updates (it’s improbable that both will update simultaneously) but also by extending Bluetooth robustness (hubs commonly communicate to devices by Bluetooth but between each other by WiFi). Obviously the hubs need to be placed in different parts of the home. (Eve Extend can also be used to reach out-of-range Bluetooth devices over wifi, but isn’t compatible with my older 2015 Eve Thermo eTRVs.)

Contrasts in Smart Lighting

We recently enjoyed a week’s holiday at Pevensey Bay. The home that we rented, like our own, includes many smart features but there are some similarities and differences in approach. One area of difference in smart lighting.

The Studio, Pevensey Bay

Both our own home and The Studio have smart lighting but differ in approach. Our own smart lighting concentrates on smart bulbs, while The Studio (with the exception of the kitchen) concentrates on smart switches. So why choose one approach over the other?

At our home we have a handful of smart bulbs, with standard dumb switches. The bulbs incorporate functions like dusk-to-dawn lighting and colour change for status indication (open windows, movement in garage etc). At The Studio there are a large number of smart switches controlling an even larger number of standard dumb bulbs.

So let’s think about choices:

Cost.

If you are going to control multiple bulbs together on one circuit then it’s generally cheaper to have one smart switch than multiple smart bulbs.

4 gang Lightwave switch

Coloured smart bulb

Colour.

Smart switches can either control on/off or act as dimmers, but they don’t vary colour. Some smart bulbs can vary colour. If you want to control colour then you’re going to need some sort of remote control (like The Studio in the kitchen) or access via smart device like a phone or tablet.

Wiring.

Most smart light switches require a neutral wire. However many UK homes do NOT provide a neutral wire at the switch. A typical UK light switch has a live, switched live and earth only (I.e. no neutral) although there may be confusion as the switched live is commonly blue (or black in older homes) like a neutral would be.

Adding a neutral can be relatively costly as it requires a new cable between the ceiling rose and the switch. If having a re-wire it’s worth adding neutrals to the specification just in case.

Typical ceiling rose wiring UK.
Example automation

Automation.

Both switches or bulbs can be automated via a smart hub for on/off or brightness to respond to time-of-day, movement, door or window opening etc; so that’s not really grounds to chose between smart switches or smart bulbs.

What about combining smart switches and bulbs on the same circuit?

In short I don’t really know why you’d want to. Even if it worked properly you’d have incurred extra cost for the second smart device for limited benefit as you’ve duplicated the smart functions, but it’s likely not to work properly. Even with simple on/off functions the smart bulb will be missed by the hub when the power is off at the switch (although some ecosystems allow this error to be masked), but with dimmers it will probably be worse as the bulb may not function correctly when the dimmer is set to less than 100% brightness.

You might consider using the smart switch as an smart button without using the switched output, and feed the smart bulb from a permanent live, but that’s not combining them on the same circuit. This could be achieved physically by something as simple as moving the switched live output to the live input on a switch. However the two smart devices, switch and bulb, would then need to be linked entirely programmatically through the hub. That would be at least two automations in HomeKIt – an ‘on’ automation and an ‘off’ automation.

Conclusion

There isn’t a right answer whether smart switches or smart bulbs are best. The best choice will depend on your situation.