
I’ve recently had the opportunity through my day job to make a lot of use of an electric car that was not my own. However this presented the inconvenience that I couldn’t charge it on my own home wallbox in the garage since my wallbox has the older Type 1 5-pin connector to suit my own car, but the borrowed car has the more modern Type 2 7-pin connector. If you were buying a wallbox the obvious solution to charging vehicles of both types is a wallbox with a Type 2 socket, however I didn’t want to go down the new wallbox route as I wanted to retain my existing smart controls.
I couldn’t add a socket to my existing wallbox due to packaging constraints (where would I install the socket) and my unsuitable protocol controller (protocol controllers for socketed wallboxes are more complex as they need to decode cable current rating and operate a solenoid). Thus I decided to go down the two outlet cables route as the lowest cost solution given that I already had the cable. My outlay was limited to a relay to switch the power to the second cable, and a switch to decide which cable to use. Use of two relays ensures that only one outlet is live at a time, as there would be a risk of touching the exposed contacts of whichever cable was not in use.
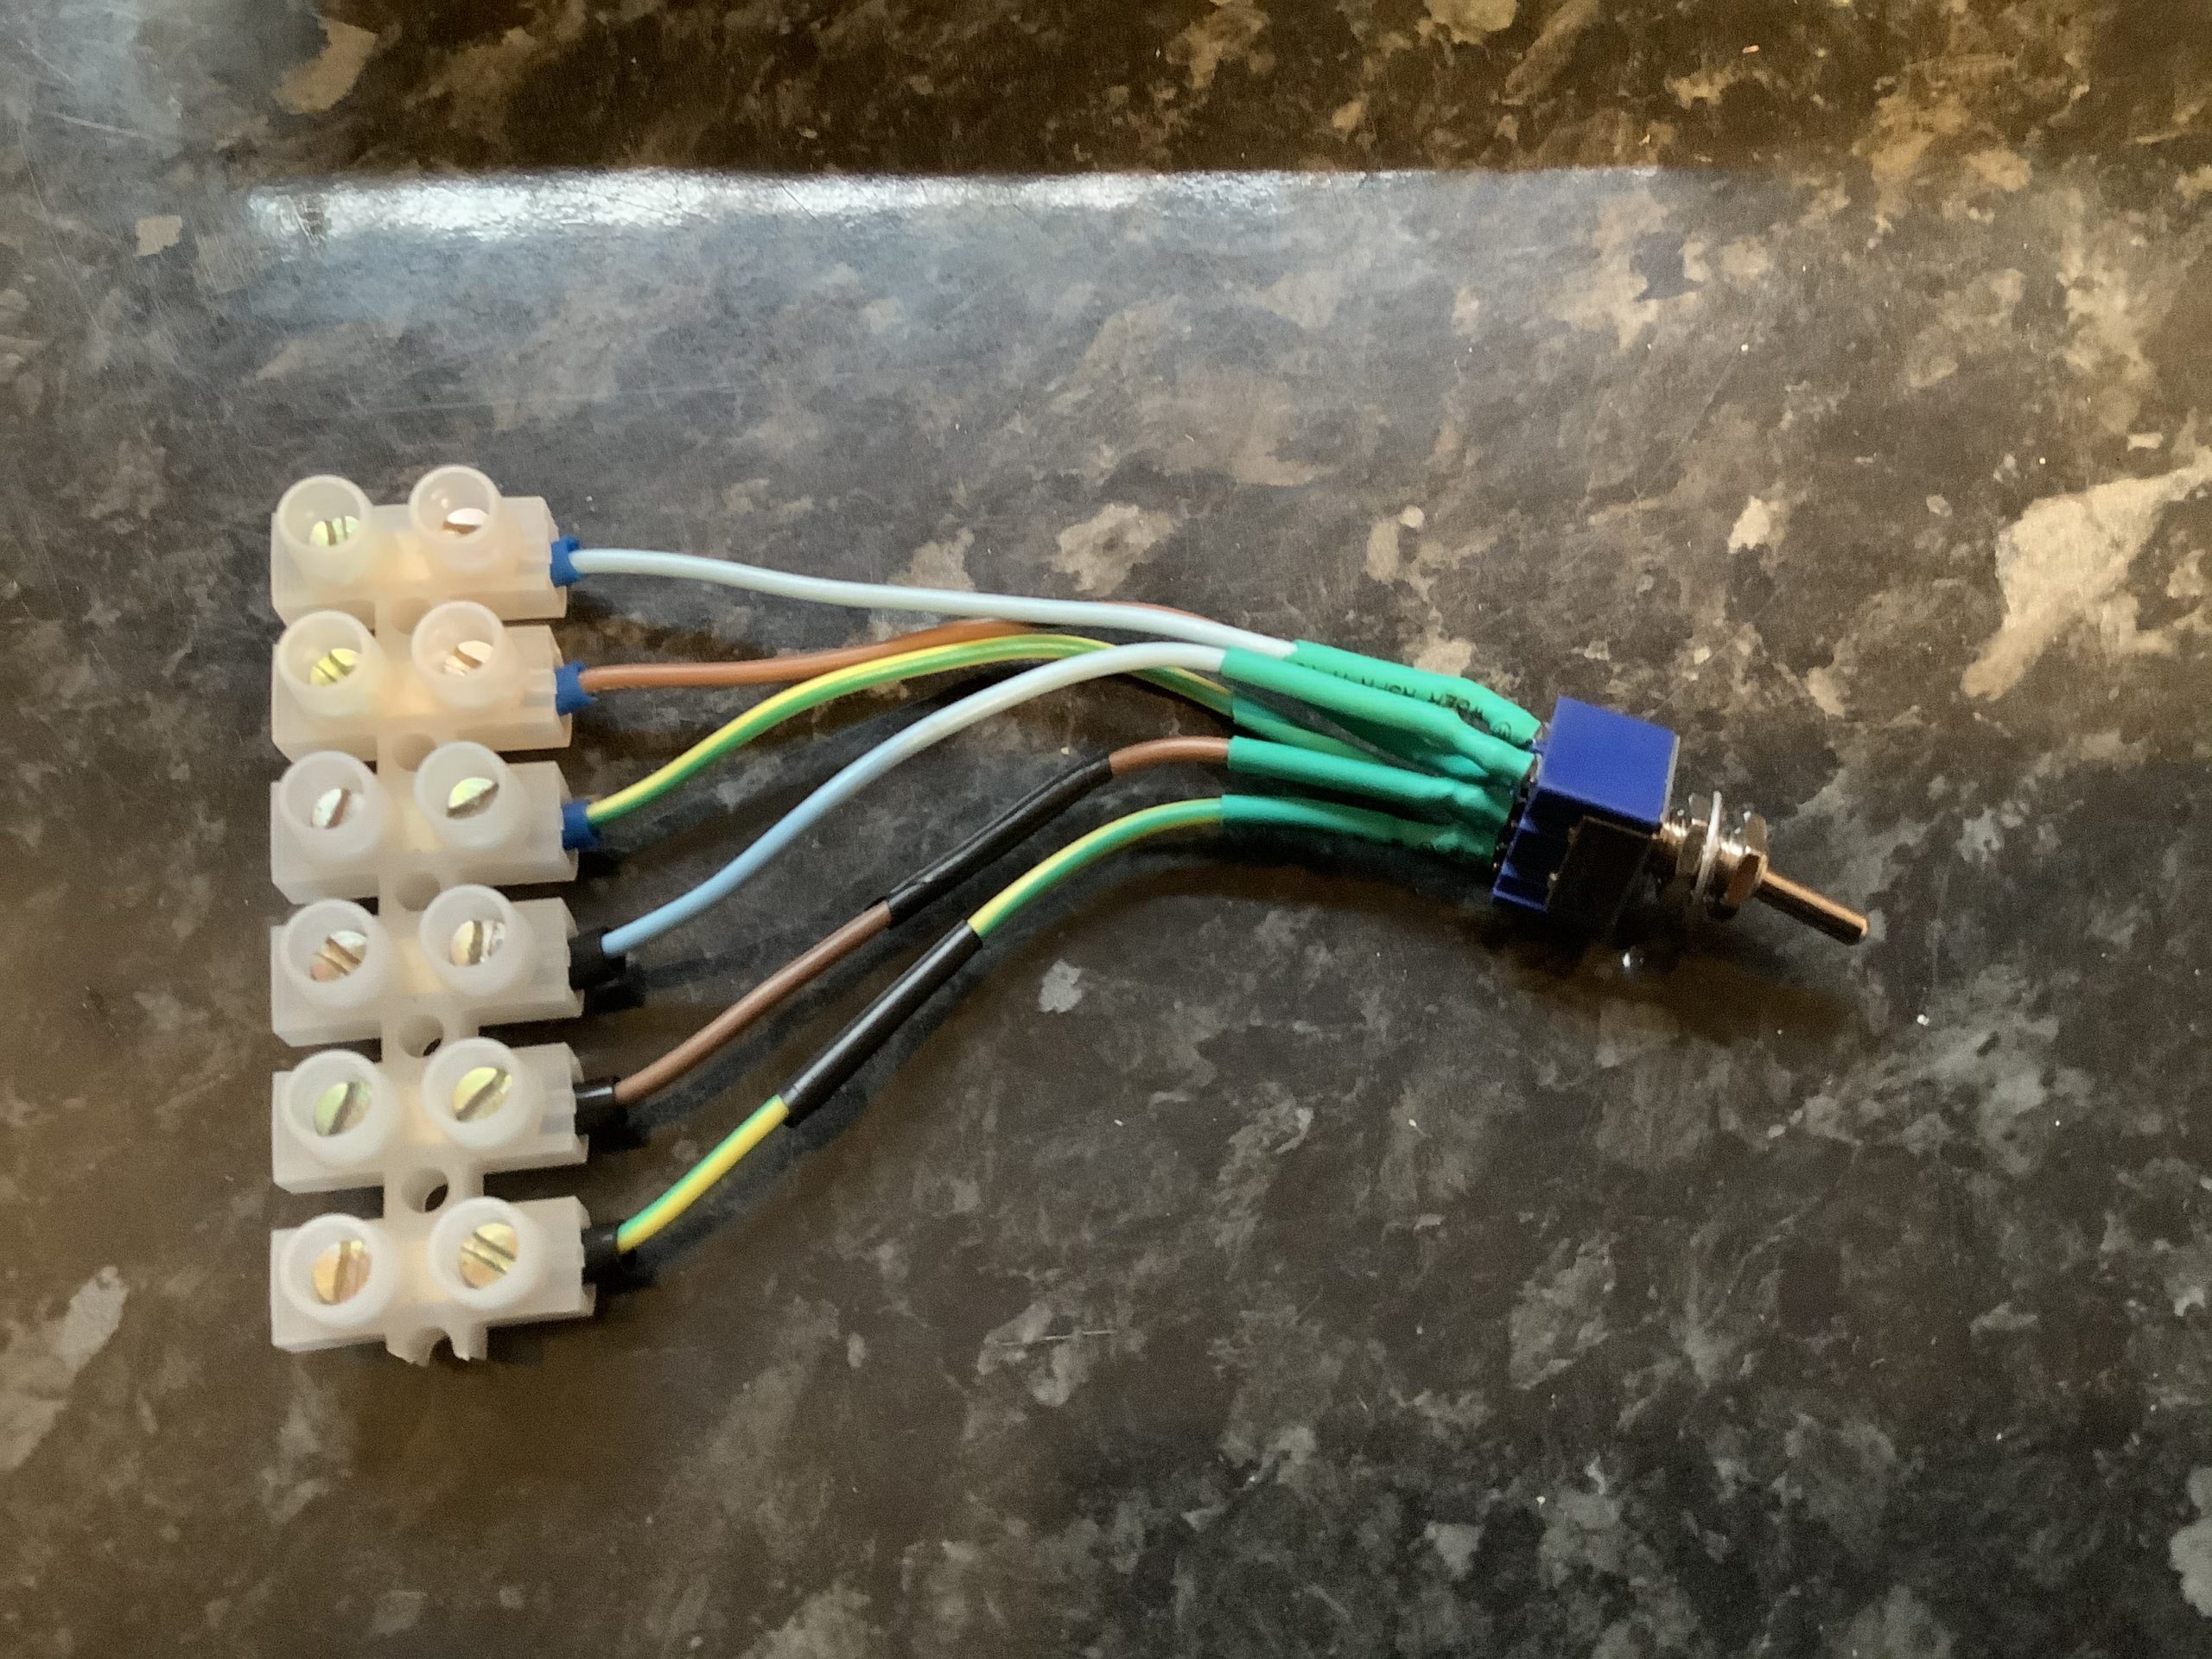
The switch sits between the protocol controller and the relays. One side of the switch directs the relay output of the protocol controller to enable either the original relay for the Type 1 connector or the new relay for the Type 2 connector, while the second side of the switch connects the corresponding control pilot to the protocol controller. The control pilot handles the communication with the vehicle for things like current limits and handshakes.
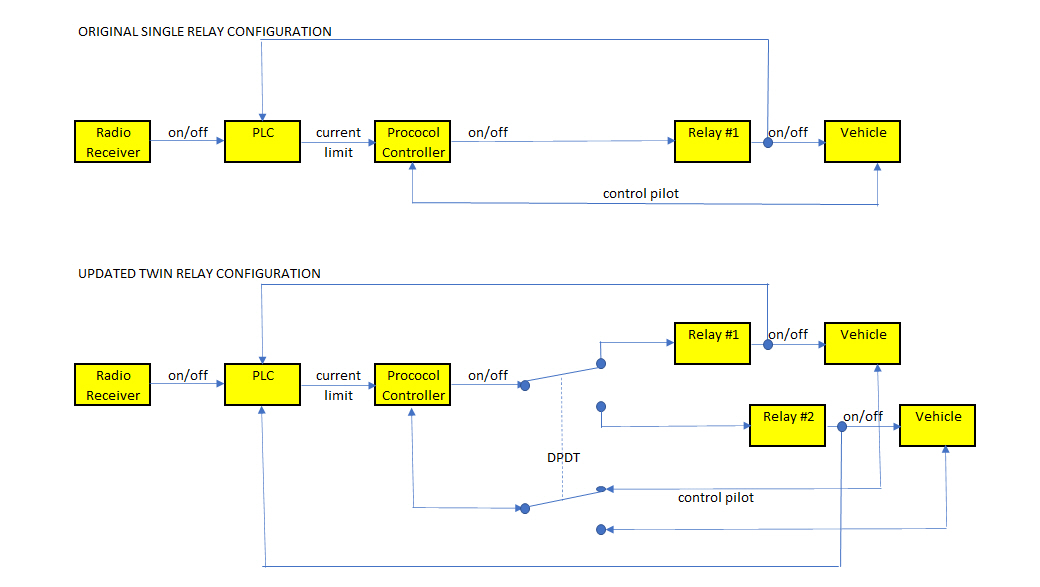
The open/closed status of each relay is also fed back to the Programmable Logic Controller (PLC) that sets the variable maximum current limit (off, 6, 10 or 16 Amps). The PLC had plenty of spare inputs for the connection to the new relay. Some small software changes were required so that the PLC respond to inputs from both relays (generally either relay #1 or relay #2 is on, or both relay #1 and relay #2 are off).

From left to right:
- 2 slots – double pole isolation switch
- 4 slots – Programmable Logic Controller (PLC)
- 2 slots – protocol controller
- 1 slot – original relay for Type 1 / J1772 connector and cable
- 1 slot – new relay for Type 2 connector and cable
- in side panel – DPDT switch
The resulting wallbox has demonstrated its capability to charge vehicles with either Type 1 or Type 2 inlets, responding to tariff-based on/off signals from my HEMS or surplus solar signals from my ImmerSUN.